© 2017 The original authors.
This guide has moved to https://github.com/wildfly/quickstart/blob/11.x/guide/
1. Introduction
This guide will walk you through installing and starting up JBoss WildFly. It will then introduce key features of the Java EE 6 (Web Profile) programming model, of which JBoss WildFly is a certified implementation.
|
Java EE 7
The Java EE 7 platform offers developers the ability to write distributed, transactional and portable applications quickly and easily. We class applications that require these capabilities "enterprise applications". These applications must be fast, secure and reliable. Java EE has always offered strong messaging (JMS), transactional (JTA) and resource (JCA) capabilities as well as exposing web services via SOAP (JAX-WS). Java EE 5 started a radical shift for the programming model, offering a powerful, declarative and lightweight object-relational mapper (JPA) and annotation-driven, lightweight access to enterprise services (EJB 3). Java EE 6 added a type-safe, loosely coupled programming model (CDI), declarative validation of constraints (Bean Validation) and RESTful web services (JAX-RS) to produce a complete, modern development environment. |
JBoss WildFly depart from the familiar structure of previous JBoss AS versions, so we recommend all developers follow the steps in Getting Started with JBoss WildFly to install and start up the application server for the first time.
JBoss WildFly come with a series of quickstarts aimed to get you up to writing applications with minimal fuss. We recommend to start by working through the quickstarts in this guide, in the order they are presented. If you have previous experience with Java EE 6, you may wish to skip some or all of the quickstarts.
Core
-
Helloworld Quickstart. If you have previously developed applications using technologies such as JSF or Wicket, and EJB or Spring, you may wish to skip this quickstart.
-
Numberguess Quickstart. If you have previously developed applications using technologies such as JSF or Wicket, EJB or Spring, and JPA or Hibernate you may wish to skip this quickstart.
-
Greeter Quickstart. If you are a Java EE wizard you may wish to skip this quickstart.
-
Kitchensink Quickstart. A great starting point for your project.
1.1. Downloading the quickstarts
The quickstarts are are available for download from JBoss Developer Framework. Make sure you download the latest zip!
2. Getting started with WildFly
To run the quickstarts with the provided build scripts, you’ll need:
|
If you already have any of these pieces of software, there is no need to install them again! |
- Java 8, to run WildFly and Maven
-
Choose your Java runtime, and follow their installation instructions. For example, you could choose one of:
- Maven 3, to build and deploy the quickstarts
-
Follow the official Maven installation guide if you don’t already have Maven 3 installed. You can check which version of Maven you have installed (if any) by running
mvn --version. If you see a version newer than 3.0.0, you are ready to go. - The JBoss WildFly runtime
-
Download JBoss WildFly from the WildFly download page
- The WildFly quickstarts
-
Available from WildFly Quickstarts
If you wish to use the examples from an IDE, we recommend using JBoss Developer Studio, or Eclipse with JBoss Tools.
- JBoss Developer Studio
-
Download JBDS from http://devstudio.jboss.com/download/.
- Eclipse, with JBoss Tools
-
Download JBoss Tools from http://jboss.org/tools. Make sure you install m2eclipse as well.
|
JBoss WildFly offer the ability to manage multiple AS instances from a single control point. A collection of such servers are referred to as members of a "domain", with a single Domain Controller process acting as the management control point. Domains can span multiple physical (or virtual) machines, with all AS instances on a given host under the control of a Host Controller process. The Host Controllers interact with the Domain Controller to control the lifecycle of the AS instances running on that host and to assist the Domain Controller in managing them. JBoss WildFly also offers a standalone mode, which is perfect for a single server. We use this throughout the quickstarts. |
2.1. Installing and starting the JBoss server on Linux, Unix or Mac OS X
First, let’s verify that both Java and Maven are correctly installed. In a console, type:
java -version
You should see a version string (at least 1.8.0) printed. If not, contact your provider of Java for assistance. Next, type:
mvn --version
You should see a version string (at least 3.3.0) printed. If not, contact the Maven community for assistance.
Next, we need to choose a location for WildFly to live. By default, WildFly will be extracted into wildfly-11.x.x.x (where 11.x.x.x matches the version you downloaded):
unzip wildfly-11.x.x.x.zip
Now, let’s start WildFly in standalone mode:
wildfly-11.x.x.x/bin/standalone.sh
|
If you want to stop WildFly, simply press Crtl-C whilst the terminal has focus. |
That’s it, WildFly is installed and running! Visit http://localhost:8080/ to check the server has started properly.
|
You can find the server log for standalone instances in
|
2.2. Installing and starting the JBoss server on Windows
First, let’s verify that both Java and Maven are correctly installed. In a Command Prompt, type:
java -version
You should see a version string (at least 1.8.0) printed. If not, contact your provider of Java for assistance. Next, type:
mvn --version
You should see a version string (at least 3.3.0) printed. If not, contact the Maven community for assistance.
Next, we need to choose a location for JBoss WildFly to live. By default, JBoss WildFly will be extracted into wildfly-11.x.x.x (where 11.x.x.x matches the version you downloaded). Unzip JBoss Enterprise Application Platform or JBoss WildFly using your tool of choice.
Finally, let’s start JBoss WildFly in standalone mode. Locate your installation and run standalone.bat located in bin.
|
If you want to stop the server, simply press Crtl-C whilst the terminal has focus. |
That’s it, JBoss WildFly is installed and running! Visit http://localhost:8080/ to check the server has started properly.
|
You can find the server log for standalone instances in
|
2.3. Starting the JBoss server from JBDS or Eclipse with JBoss Tools
You may choose to use JBoss Developer Studio, or Eclipse with JBoss Tools, rather than the command line to run JBoss WildFly, and to deploy the quickstarts. If you don’t wish to use Eclipse, you should skip this section.
Make sure you have installed and started JBoss Developer Studio or Eclipse. First, we need to add our WildFly instance to it. First, navigate to Preferences:
Now, locate the JBoss Tools Runtime Detection preferences:
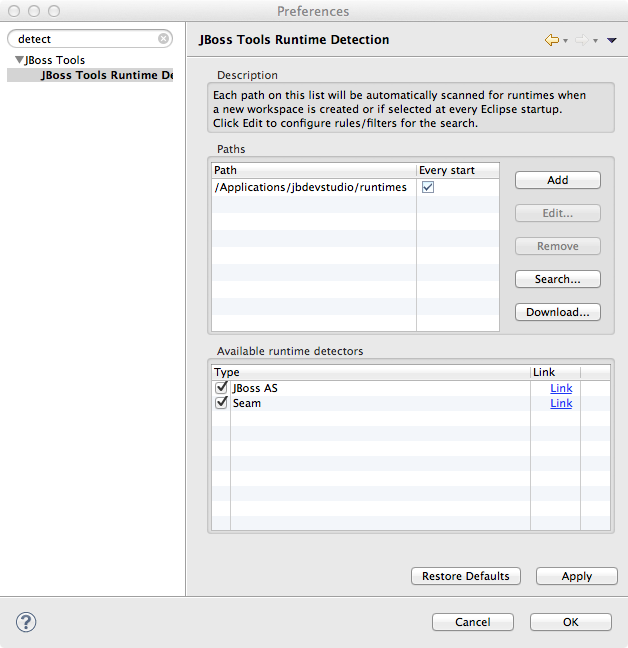
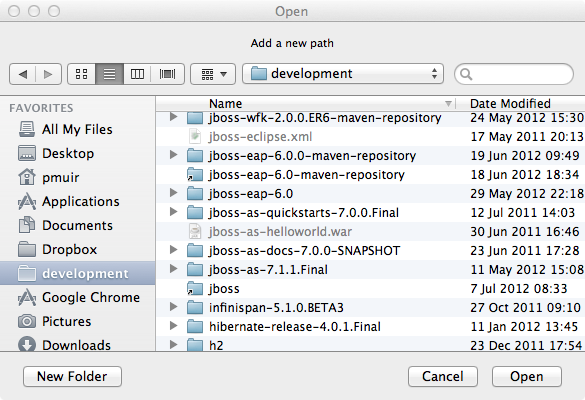
Click Add and locate where you put servers on your disk:
Any available servers will be located, now all you need to do is click OK, and then OK on the preferences dialog:

Now, let’s start the server from Eclipse. If you previously started a server from the command line, you should stop it there first.
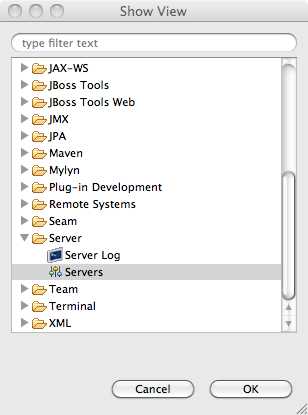
First, we need to make sure the Server tab is on view. Open the Window → Show View → Other… dialog:
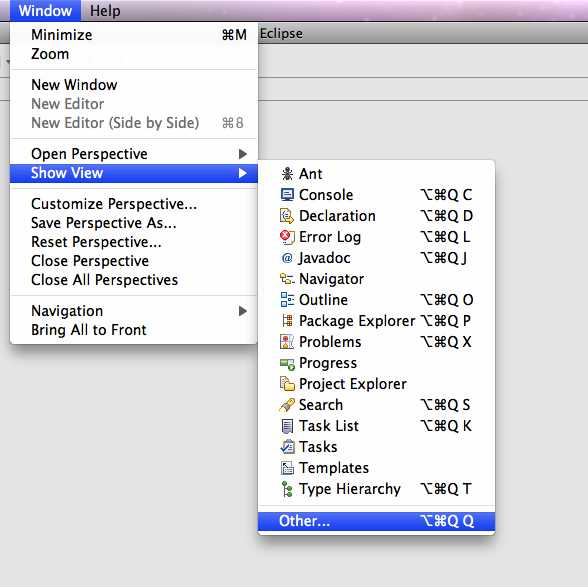
And select the Server view:
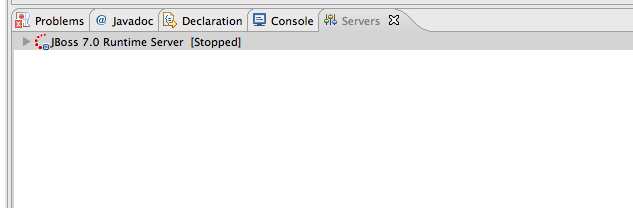
You should see the Server View appear with the detected servers:
Now, we can start the server. Right click on the server in the Server view, and select Start :
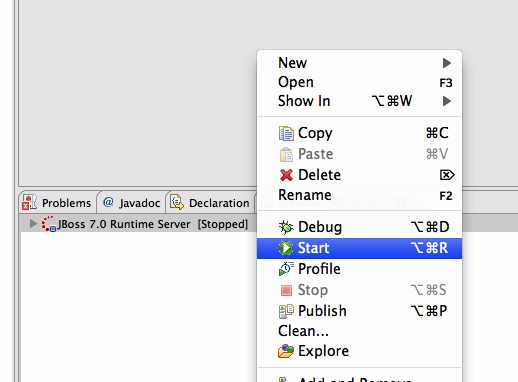
|
If you want to debug your application, you can simply select Debug rather than Start . This will start the server in debug mode, and automatically attach the Eclipse debugger. |
You’ll see the server output in the Console :
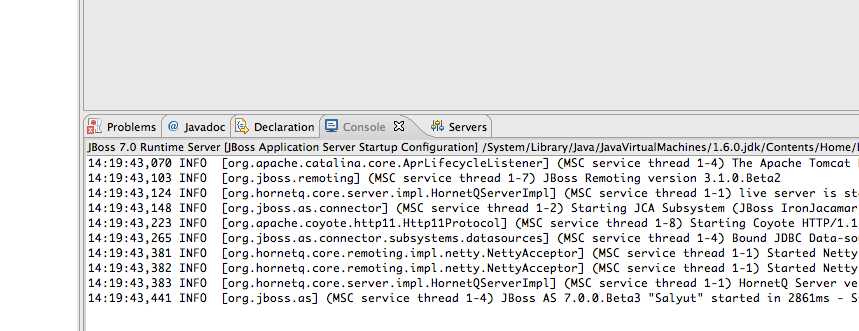
That’s it, we now have the server up and running in Eclipse!
2.4. Importing the quickstarts into Eclipse
In order to import the quickstarts into Eclipse, you will need m2eclipse installed. If you have JBoss Developer Studio, then m2eclipse is already installed.
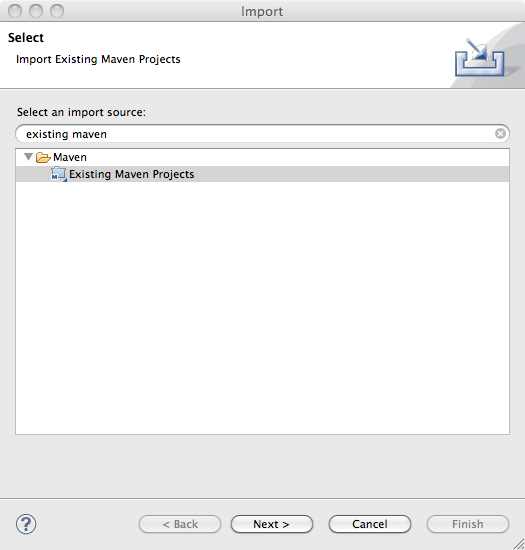
First, choose File → Import…:

Select Existing Maven Projects:
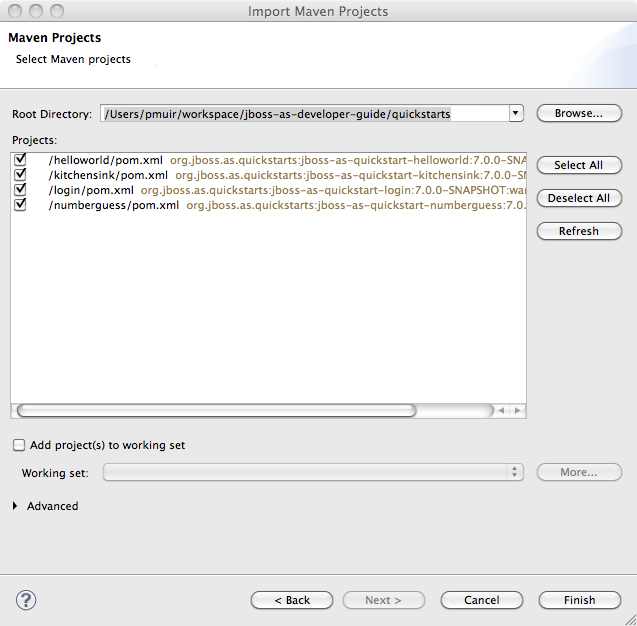
Click on Browse, and navigate to the quickstarts/ directory:

Finally, make sure all 4 quickstarts are found and selected, and click Finish:
Eclipse should now successfully import 4 projects:
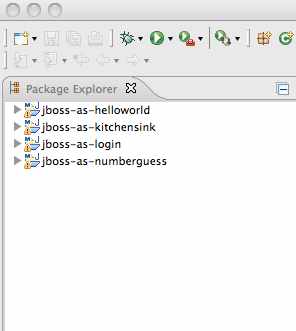
It will take a short time to import the projects, as Maven needs to download the project’s dependencies from remote repositories.
2.5. Managing JBoss WildFly
Here we will quickly outline how you can access both the command line interface and the web management interface for managing JBoss WildFly. Detailed information for both can be found in the Administration and Configuration Guide for JBoss Enterprise Application Platform 6 or the Admin Guide for JBoss WildFly.
When the server is running, the web management interface can be accessed at http://localhost:9990/console. You can use the web management interface to create datasources, manage deployments and configure the server.
JBoss WildFly also comes with a command line interface. To run it on Linux, Unix or Mac, execute:
wildfly-11.x.x.x/bin/jboss-admin.sh --connect
Or, on Windows:
wildfly-11.x.x.x/bin/jboss-admin.bat --connect
Once started, type help to discover the commands available to you.
Throughout this guide we use the wildfly maven plugin to deploy and undeploy applications. This plugin uses the Native Java Detyped Management API to communicate with the server. The Detyped API is used by management tools to control an entire domain of servers, and exposes only a small number of types, allowing for backwards and forwards compatibility.
3. CDI + Servlet: Helloworld quickstart
This quickstart shows you how to deploy a simple servlet to JBoss WildFly. The business logic is encapsulated in a service, which is provided as a CDI bean, and injected into the Servlet.
|
Contexts and Dependency Injection for Java EE
CDI is a new specification in Java EE 6, inspired by JBoss Seam and Google Guice, and also drawing on lessons learned from frameworks such as Spring. It allows application developers to concentrate on developing their application logic by providing the ability to wire services together, and abstract out orthogonal concerns, all in a type safe manner. |
Switch to the quickstarts/helloworld directory and instruct Maven to build and deploy the application:
mvn package wildfly:deploy
The quickstart uses a Maven plugin to deploy the application. The plugin requires JBoss WildFly to be running (you can find out how to start the server in Installing and starting the JBoss server on Linux, Unix or Mac OS X or Installing and starting the JBoss server on Windows).
Now, check if the application has deployed properly by clicking http://localhost:8080/wildfly-helloworld/HelloWorld. If you see a "Hello World" message it’s all working!
|
Should you wish to undeploy the quickstart, or redeploy after making some changes, it’s pretty easy:
|
It’s time to pull the covers back and dive into the internals of the quickstart.
3.1. Deploying the Helloworld quickstart using JBoss Developer Studio, or Eclipse with JBoss Tools
You may choose to deploy the quickstart using JBoss Developer Studio, or Eclipse with JBoss Tools. You’ll need to have JBoss WildFly started in the IDE (as described in Starting the JBoss server from JBDS or Eclipse with JBoss Tools) and to have imported the quickstarts into Eclipse (as described in Importing the quickstarts into Eclipse).
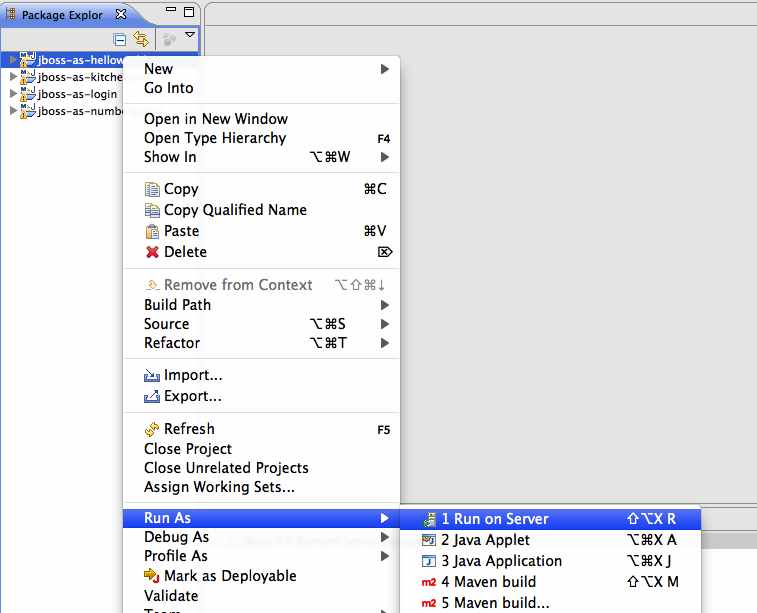
With the quickstarts imported, you can deploy the quickstart by right clicking on the wildfly-helloworld project, and choosing Run As → Run On Server:
Make sure the correct server is selected, and hit Finish:

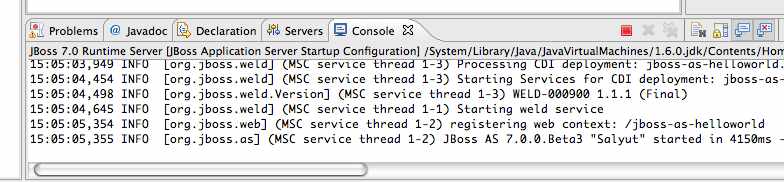
You should see the server start up (unless you already started it in Starting the JBoss server from JBDS or Eclipse with JBoss Tools) and the application deploy in the Console log
3.2. The helloworld quickstart in depth
The quickstart is very simple - all it does is print "Hello World" onto a web page.
The helloworld quickstart is comprised of a servlet and a CDI bean. We also include an empty beans.xml file, which tells JBoss WildFly to look for beans in this application and to activate the CDI. beans.xml is located in WEB-INF/, which can be found in the src/main/webapp directory. Also in this directory we include index.html which uses a simple meta refresh to send the users browser to the Servlet, which is located at http://localhost:8080/wildfly-helloworld/HelloWorld.
All the configuration files for this quickstart are located in WEB-INF/, which can be found in the src/main/webapp directory.
Notice that we don’t even need a web.xml!
Let’s start by taking a look at the servlet:
@SuppressWarnings("serial")
@WebServlet("/HelloWorld")                                           (1)
public class HelloWorldServlet extends HttpServlet {

   static String PAGE_HEADER =
       "<html><head><title>helloworld</title></head><body>";                (2)

   static String PAGE_FOOTER = "</body></html>";

   @Inject
   HelloService helloService;                                        (3)

   @Override
   protected void doGet(HttpServletRequest req,
                        HttpServletResponse resp)
                        throws ServletException, IOException {
      resp.setContentType("text/html");
      PrintWriter writer = resp.getWriter();
      writer.println(PAGE_HEADER);
      writer.println("<h1>" +
                     helloService.createHelloMessage("World") +      (4)
                     "</h1>");
      writer.println(PAGE_FOOTER);
      writer.close();
   }

}| 1 | If you’ve used Servlet before, then you’ll remember having to use xml to register your servlets. Fortunately, this is a thing of the past. Now all you need to do is add the @WebServlet annotation, and provide a mapping to a URL used to access the servlet. Much cleaner! |
| 2 | Every web page needs to be correctly formed HTML. We’ve created static Strings to hold the minimum header and footer to write out. |
| 3 | We inject the HelloService (a CDI bean) which generates the actual message. This allows to alter the implementation of HelloService at a later date without changing the view layer at all (assuming we don’t alter the API of HelloService ). |
| 4 | We call into the service to generate the message "Hello World", and write it out to the HTTP request. |
|
The package declaration and imports have been excluded from these listings. The complete listing is available in the quickstart source. |
Now we understand how the information is sent to the browser, let’s take a look at the service.
public class HelloService {

   String createHelloMessage(String name) {
      return "Hello " + name + "!";
   }

}
The service is very simple - no registration (XML or annotation) is required!
4. CDI + JSF: Numberguess quickstart
This quickstart shows you how to create and deploy a simple application to JBoss WildFly; the application does not persist any information. Information is displayed using a JSF view, and business logic is encapsulated in two CDI beans.
Switch to the quickstarts/numberguess directory and instruct Maven to build and deploy the application:
mvn package wildfly:deploy
The quickstart uses a Maven plugin to deploy the application. The plugin requires JBoss WildFly to be running (you can find out how to start the server in Installing and starting the JBoss server on Linux, Unix or Mac OS X or Installing and starting the JBoss server on Windows).
Or you can start the server using an IDE, like JBoss Developer Studio.
Now, see if you can determine the most efficient approach to pinpoint the random number at the URL http://localhost:8080/wildfly-numberguess.
|
Should you wish to undeploy the quickstart, or redeploy after making some changes, it’s pretty easy:
|
It’s time to pull the covers back and dive into the internals of the quickstart.
4.1. Deploying the Numberguess quickstart using Eclipse
You may choose to deploy the quickstart using Eclipse. You’ll need to have JBoss WildFly started in Eclipse as described in Starting the JBoss server from JBDS or Eclipse with JBoss Tools) and to have imported the quickstarts into Eclipse (as described in Importing the quickstarts into Eclipse).
With the quickstarts imported, you can deploy the quickstart by right clicking on the wildfly-numberguess project, and choosing Run As → Run On Server:

Make sure the correct server is selected, and hit Finish:
You should see the server start up (unless you already started it in Starting the JBoss server from JBDS or Eclipse with JBoss Tools) and the application deploy in the Console log:

4.2. The numberguess quickstart in depth
In the numberguess application you get 10 attempts to guess a number between 1 and 100. After each attempt, you’re told whether your guess was too high or too low.
The quickstart is comprised of a number of beans, configuration files and Facelets (JSF) views, packaged as a war module. Let’s start by examining the configuration files.
All the configuration files for this quickstart are located in WEB-INF/, which can be found in the src/main/webapp directory. First, we have the JSF 2.0 version of faces-config.xml. A standardized version of Facelets is the default view handler in JSF 2.0, so there’s really nothing that we have to configure. WildFly goes above and beyond Java EE here, and will automatically configure JSF for you if you include this file. Thus, the configuration consists of only the root element.
<faces-config version="2.0"
   xmlns="http://java.sun.com/xml/ns/javaee"
   xmlns:xsi="http://www.w3.org/2001/XMLSchema-instance"
   xsi:schemaLocation="
      http://java.sun.com/xml/ns/javaee
      http://java.sun.com/xml/ns/javaee/web-facesconfig_2_0.xsd">

</faces-config>
There’s also an empty beans.xml file, which tells WildFly to look for beans in this application and to activate the CDI.
Notice that we don’t even need a web.xml!
Let’s take a look at the main JSF view, src/main/webapp/home.xhtml.
|
JSF uses the .xhtml extension for source files, but serves up the rendered views with the .jsf extension. |
<!DOCTYPE html PUBLIC "-//W3C//DTD XHTML 1.0 Transitional//EN"
   "http://www.w3.org/TR/xhtml1/DTD/xhtml1-transitional.dtd">
<html xmlns="http://www.w3.org/1999/xhtml"
   xmlns:ui="http://java.sun.com/jsf/facelets"
   xmlns:h="http://java.sun.com/jsf/html"
   xmlns:f="http://java.sun.com/jsf/core">

<head>
<meta http-equiv="Content-Type" content="text/html;
    charset=iso-8859-1" />
<title>numberguess</title>
</head>

<body>
   <div id="content">
      <h1>Guess a number...</h1>
      <h:form id="numberGuess">

         <!-- Feedback for the user on their guess -->
         <div style="color: red">                                    (1)
            <h:messages id="messages" globalOnly="false" />
            <h:outputText id="Higher" value="Higher!"
               rendered="#{game.number gt game.guess and game.guess ne 0}" />
            <h:outputText id="Lower" value="Lower!"
               rendered="#{game.number lt game.guess and game.guess ne 0}" />
         </div>

         <!-- Instructions for the user -->
         <div>                                                       (2)
            I'm thinking of a number between <span
               id="numberGuess:smallest">#{game.smallest}</span> and <span
               id="numberGuess:biggest">#{game.biggest}</span>. You have
            #{game.remainingGuesses} guesses remaining.
         </div>

         <!-- Input box for the users guess, plus a button to submit, and reset -->
         <!-- These are bound using EL to our CDI beans -->
         <div>
            Your guess:                                              (3)
            <h:inputText id="inputGuess" value="#{game.guess}"
               required="true" size="3"
               disabled="#{game.number eq game.guess}"
               validator="#{game.validateNumberRange}" />            (4)
            <h:commandButton id="guessButton" value="Guess"
               action="#{game.check}"
               disabled="#{game.number eq game.guess}" />
         </div>
         <div>                                                       (5)
            <h:commandButton id="restartButton" value="Reset"
               action="#{game.reset}" immediate="true" />
         </div>
      </h:form>

   </div>

   <br style="clear: both" />

</body>
</html>| 1 | There are a number of messages which can be sent to the user, "Higher!" and "Lower!" |
| 2 | As the user guesses, the range of numbers they can guess gets smaller - this sentence changes to make sure they know the number range of a valid guess. |
| 3 | This input field is bound to a bean property using a value expression. |
| 4 | A validator binding is used to make sure the user doesn’t accidentally input a number outside of the range in which they can guess - if the validator wasn’t here, the user might use up a guess on an out of bounds number. |
| 5 | There must be a way for the user to send their guess to the server. Here we bind to an action method on the bean. |
The quickstart consists of 4 classes, the first two of which are qualifiers. First, there is the @Random qualifier, used for injecting a random number:
|
A qualifier is used to disambiguate between two beans both of which are eligible for injection based on their type. For more, see the Weld Reference Guide. |
@Target({ TYPE, METHOD, PARAMETER, FIELD })
@Retention(RUNTIME)
@Documented
@Qualifier
public @interface Random {

}
There is also the @MaxNumber qualifier, used for injecting the maximum number that can be injected:
@Retention(RUNTIME)
@Documented
@Qualifier
public @interface MaxNumber {

}
The application-scoped Generator class is responsible for creating the random number, via a producer method. It also exposes the maximum possible number via a producer method:
@SuppressWarnings("serial")
@ApplicationScoped
public class Generator implements Serializable {

   private java.util.Random random = new java.util.Random(System.currentTimeMillis());

   private int maxNumber = 100;

   java.util.Random getRandom() {
      return random;
   }

   @Produces
   @Random
   int next() {
      // a number between 1 and 100
      return getRandom().nextInt(maxNumber - 1) + 1;
   }

   @Produces
   @MaxNumber
   int getMaxNumber() {
      return maxNumber;
   }
}
The Generator is application scoped, so we don’t get a different random each time.
The final bean in the application is the session-scoped Game class. This is the primary entry point of the application. It’s responsible for setting up or resetting the game, capturing and validating the user’s guess and providing feedback to the user with a FacesMessage. We’ve used the post-construct lifecycle method to initialize the game by retrieving a random number from the @RandomInstance<Integer> bean.
You’ll notice that we’ve also added the @Named annotation to this class. This annotation is only required when you want to make the bean accessible to a JSF view via EL (i.e. #{game})
@SuppressWarnings("serial")
@Named
@SessionScoped
public class Game implements Serializable {

   /**
    * The number that the user needs to guess
    */
   private int number;

   /**
    * The users latest guess
    */
   private int guess;

   /**
    * The smallest number guessed so far (so we can track the valid guess range).
    */
   private int smallest;

   /**
    * The largest number guessed so far
    */
   private int biggest;

   /**
    * The number of guesses remaining
    */
   private int remainingGuesses;

   /**
    * The maximum number we should ask them to guess
    */
   @Inject
   @MaxNumber
   private int maxNumber;

   /**
    * The random number to guess
    */
   @Inject
   @Random
   Instance<Integer> randomNumber;

   public Game() {
   }

   public int getNumber() {
      return number;
   }

   public int getGuess() {
      return guess;
   }

   public void setGuess(int guess) {
      this.guess = guess;
   }

   public int getSmallest() {
      return smallest;
   }

   public int getBiggest() {
      return biggest;
   }

   public int getRemainingGuesses() {
      return remainingGuesses;
   }

   /**
    * Check whether the current guess is correct, and update the biggest/smallest guesses as needed.
    * Give feedback to the user if they are correct.
    */
   public void check() {
      if (guess > number) {
         biggest = guess - 1;
      } else if (guess < number) {
         smallest = guess + 1;
      } else if (guess == number) {
         FacesContext.getCurrentInstance().addMessage(null, new FacesMessage("Correct!"));
      }
      remainingGuesses--;
   }

   /**
    * Reset the game, by putting all values back to their defaults, and getting a new random number.
    * We also call this method when the user starts playing for the first time using
    * {@linkplain PostConstruct @PostConstruct} to set the initial values.
    */
   @PostConstruct
   public void reset() {
      this.smallest = 0;
      this.guess = 0;
      this.remainingGuesses = 10;
      this.biggest = maxNumber;
      this.number = randomNumber.get();
   }

   /**
    * A JSF validation method which checks whether the guess is valid. It might not be valid because
    * there are no guesses left, or because the guess is not in range.
    *
    */
   public void validateNumberRange(FacesContext context, UIComponent toValidate, Object value) {
      if (remainingGuesses <= 0) {
         FacesMessage message = new FacesMessage("No guesses left!");
         context.addMessage(toValidate.getClientId(context), message);
         ((UIInput) toValidate).setValid(false);
         return;
      }
      int input = (Integer) value;

      if (input < smallest || input > biggest) {
         ((UIInput) toValidate).setValid(false);

         FacesMessage message = new FacesMessage("Invalid guess");
         context.addMessage(toValidate.getClientId(context), message);
      }
   }
}
5. CDI + JPA + EJB + JTA + JSF: Greeter quickstart
This quickstart shows you how to create and deploy an application which persists information to a database to JBoss WildFly. Information is displayed using JSF views, business logic is encapsulated in CDI beans, information is persisted using JPA, and transactions can be controlled manually or using EJB.
Switch to the quickstarts/greeter directory and instruct Maven to build and deploy the application:
mvn package wildfly:deploy
The quickstart uses a Maven plugin to deploy the application. The plugin requires JBoss WildFly to be running (you can find out how to start the server in Installing and starting the JBoss server on Linux, Unix or Mac OS X or Installing and starting the JBoss server on Windows).
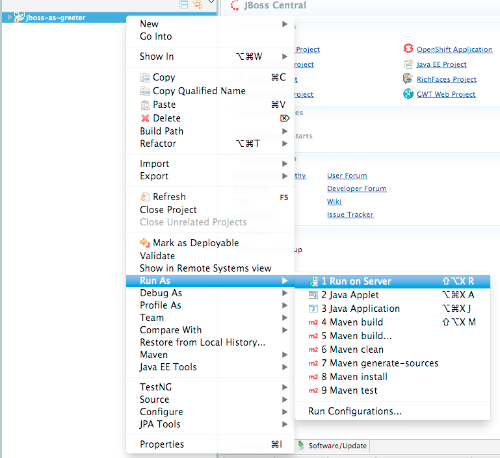
Or you can start the server using an IDE, like JBoss Developer Studio. If you are using JBoss Developer Studio, you can deploy the quickstart by right clicking on the greeter project, and choosing Run As → Run On Server:
Make sure the server is selected, and hit Finish:
You should see the server start up (unless you already started it in Starting the JBoss server from JBDS or Eclipse with JBoss Tools) and the application deploy in the Console log:

To use the application, visit http://localhost:8080/greeter/.
5.1. The greeter quickstart in depth
In the quickstart, all users are stored in an H2 database (an in-memory, embedded database provided out of the box in JBoss WildFly). Each user is stored as an entity, and entities are mapped to the database using JPA. By default, transactions are managed manually, using the JTA API. Optionally, you can use EJB to manage transactions (we’ll look at how to enable that later). We need a transaction in progress in order to read and write any entities.
The quickstart is comprised of two JSF views, an entity, and a number of CDI beans. Additionally, there are the usual configuration files in WEB-INF/ (which can be found in the src/main/webapp directory). Here we find beans.xml and faces-config.xml which tell JBoss WildFly to enable CDI and JSF for the application. Notice that we don’t need a web.xml. There are two new configuration files in WEB-INF/classes/META-INF (which can be found in the src/main/resources directory of the quickstart) — persistence.xml, which sets up JPA, and import.sql which Hibernate, the JPA provider in JBoss WildFly, will use to load the initial users into the application when the application starts.
persistence.xml is pretty straight forward, and links JPA to a datasource:
<persistence version="2.0"
    xmlns="http://java.sun.com/xml/ns/persistence"
    xmlns:xsi="http://www.w3.org/2001/XMLSchema-instance"
    xsi:schemaLocation="
        http://java.sun.com/xml/ns/persistence
        http://java.sun.com/xml/ns/persistence/persistence_2_0.xsd">
    <persistence-unit name="primary">                                (1)
        <!-- If you are running in a production environment, add a
             managed  data source, this example data source is just
             for development and testing! -->
        <!-- The datasource is deployed as
             WEB-INF/greeter-quickstart-ds.xml, you can find it in
             the source at
             src/main/webapp/WEB-INF/greeter-quickstart-ds.xml -->
        <jta-data-source>
            java:jboss/datasources/GreeterQuickstartDS               (2)
        </jta-data-source>
        <properties>
            <!-- Properties for Hibernate -->                        (3)
            <property name="hibernate.hbm2ddl.auto"
                      value="create-drop" />
            <property name="hibernate.show_sql"
                      value="false" />
        </properties>
    </persistence-unit>
</persistence>| 1 | The persistence unit is given a name, so that the application can use multiple if needed. If only one is defined, JPA will automatically use it. |
| 2 | The persistence unit references a data source. Here we are using the built in, sample, data source. |
| 3 | JPA allows us to configure the JPA provider specific properties. Here we tell Hibernate to automatically create any needed tables when the application starts (and drop them when the application is stopped). |
|
JBoss WildFly ships with a
sample datasource |
Let’s take a look at the JSF views. First up is src/main/webapp/greet.xhtml:
<!DOCTYPE html PUBLIC "-//W3C//DTD XHTML 1.0 Transitional//EN"
    "http://www.w3.org/TR/xhtml1/DTD/xhtml1-transitional.dtd">
<html xmlns="http://www.w3.org/1999/xhtml"
    xmlns:ui="http://java.sun.com/jsf/facelets"
    xmlns:h="http://java.sun.com/jsf/html"
    xmlns:f="http://java.sun.com/jsf/core">

<ui:composition template="template.xhtml">                           (1)
    <ui:define name="content">
        <h:messages />                                               (2)
        <h:form id="greetForm">
            <h:panelGrid columns="3">
                <h:outputLabel for="username">Enter username:</h:outputLabel>
                <h:inputText id="username"
                    value="#{greetController.username}" />
                <h:message for="username" />
            </h:panelGrid>
            <h:commandButton id="greet" value="Greet!"
                action="#{greetController.greet}" />
        </h:form>
        <h:outputText value="#{greetController.greeting}"
            rendered="#{not empty greetController.greeting}" />      (3)
        <br />
        <h:link outcome="/create.xhtml" value="Add a new user" />    (4)
    </ui:define>
</ui:composition>
</html>| 1 | As we have multiple views in this application, we’ve created a template that defines the common elements. We’ll examine this next. Here we define the "content" section of the page, which will be inserted into the template. |
| 2 | We output any messages for the user at the top of the form, e.g. when a new user is created. |
| 3 | The greeting message is only rendered if there is a message. |
| 4 | We also a link to the page which allows a user to be added. |
Now let’s take a look at the template. It defines common elements for the page, and allows pages which use it to insert content in various places.
<!-- The template for our app, defines some regions -->

<head>
<meta http-equiv="Content-Type" content="text/html; charset=iso-8859-1" />
<title>greeter</title>
<ui:insert name="head" />                                            (1)
</head>

<body>

    <div id="container">
        <div id="header"></div>

        <div id="sidebar"></div>

        <div id="content">
            <ui:insert name="content" />                             (2)
        </div>

        <br style="clear: both" />
    </div>

</body>
</html>| 1 | The head, defined in case a page wants to add some content to the head of the page. |
| 2 | The content, defined by a page using this template, will be inserted here |
Finally, let’s take a look at the user management page. It provides a form to add users:
<!DOCTYPE html PUBLIC "-//W3C//DTD XHTML 1.0 Transitional//EN" "http://www.w3.org/TR/xhtml1/DTD/xhtml1-transitional.dtd">
<html xmlns="http://www.w3.org/1999/xhtml"
    xmlns:ui="http://java.sun.com/jsf/facelets"
    xmlns:h="http://java.sun.com/jsf/html"
    xmlns:f="http://java.sun.com/jsf/core">

<ui:composition template="template.xhtml">
    <ui:define name="content">
        <h:messages />
        <h:form>
            <h:panelGrid columns="3">
                <h:outputLabel for="username">Enter username:</h:outputLabel>
                <h:inputText id="username" value="#{newUser.username}" />
                <h:message for="username" />

                <h:outputLabel for="firstName">Enter first name:</h:outputLabel>
                <h:inputText id="firstName" value="#{newUser.firstName}" />
                <h:message for="firstName" />

                <h:outputLabel for="lastName">Enter last name:</h:outputLabel>
                <h:inputText id="lastName" value="#{newUser.lastName}" />
                <h:message for="lastName" />

            </h:panelGrid>
            <h:commandButton action="#{createController.create}"
                value="Add User" />
        </h:form>
        <h:link outcome="/greet.xhtml">Greet a user!</h:link>
    </ui:define>
</ui:composition>
</html>
The quickstart has one entity, which is mapped via JPA to the relational database:
@Entity                                                              (1)
public class User {

    @Id                                                              (2)
    @GeneratedValue
    private Long id;

    @Column(unique = true)
    private String username;

    private String firstName;                                        (3)

    private String lastName;

    public Long getId() {                                            (4)
        return id;
    }

    public String getUsername() {
        return username;
    }

    public void setUsername(String username) {
        this.username = username;
    }

    public String getFirstName() {
        return firstName;
    }

    public void setFirstName(String firstName) {
        this.firstName = firstName;
    }

    public String getLastName() {
        return lastName;
    }

    public void setLastName(String lastName) {
        this.lastName = lastName;
    }

}| 1 | The @Entity annotation used on the class tells JPA that this class should be mapped as a table in the database. |
| 2 | Every entity requires an id, the @Id annotation placed on a field (or a JavaBean mutator/accessor) tells JPA that this property is the id. You can use a synthetic id, or a natural id (as we do here). |
| 3 | The entity also stores the real name of the user |
| 4 | As this is Java, every property needs an accessor/mutator! |
We use a couple of controller classes to back the JSF pages. First up is GreetController which is responsible for getting the user’s real name from persistence layer, and then constructing the message.
@Named                                                               (1)
@RequestScoped                                                       (2)
public class GreetController {

    @Inject
    private UserDao userDao;                                         (3)

    private String username;

    private String greeting;

    public void greet() {
        User user = userDao.getForUsername(username);
        if (user != null) {
            greeting = "Hello, " +
                       user.getFirstName() +
                       " " +
                       user.getLastName() +
                       "!";
        } else {
            greeting =
                "No such user exists! Use 'emuster' or 'jdoe'";
        }
    }

    public String getUsername() {                                    (4)
        return username;
    }

    public void setUsername(String username) {
        this.username = username;
    }

    public String getGreeting() {
        return greeting;
    }

}| 1 | The bean is given a name, so we can access it from JSF |
| 2 | The bean is request scoped, a different greeting can be made in each request |
| 3 | We inject the UserDao, which handles database abstraction |
| 4 | We need to expose JavaBean style mutators and accessors for every property the JSF page needs to access to |
The second controller class is responsible for adding a new user:
@Named                                                               (1)
@RequestScoped                                                       (2)
public class CreateController {

    @Inject                                                          (3)
    private FacesContext facesContext;

    @Inject                                                          (4)
    private UserDao userDao;

    @Named                                                           (5)
    @Produces
    @RequestScoped
    private User newUser = new User();

    public void create() {
        try {
            userDao.createUser(newUser);
            String message = "A new user with id " +
                             newUser.getId() +
                             " has been created successfully";
            facesContext.addMessage(null, new FacesMessage(message));
        } catch (Exception e) {
            String message = "An error has occured while creating" +
                             " the user (see log for details)";
            facesContext.addMessage(null, new FacesMessage(message));
        }
    }
}| 1 | The bean is given a name, so we can access it from JSF |
| 2 | The bean is request scoped, a different user can be added in each request |
| 3 | We inject the FacesContext, to allow us to send messages to the user when the user is created, or if an error occurs |
| 4 | We inject the UserDao, which handles database abstraction |
| 5 | We expose a prototype user using a named producer, which allows us to access it from a JSF page |
Now that we have the controllers in place, let’s look at the most interesting part of the application, how we interact with the database. As we mentioned earlier, by default the application uses the JTA API to manually control transactions. To implement both approaches, we’ve defined a UserDao interface, with two implementations, one of which (the EJB variant) is as an alternative which can be enabled via a deployment descriptor. If you were wondering why we "hid" the persistence logic in the UserDao, rather than placing it directly in the controller classes, this is why!
Let’s first look at the interface, and the manual transaction control variant.
public interface UserDao {
    User getForUsername(String username);

    void createUser(User user);
}
The methods are fairly self explanatory, so let’s move on quickly to the implementation, ManagedBeanUserDao:
public class ManagedBeanUserDao implements UserDao {

    @Inject
    private EntityManager entityManager;                             (1)

    @Inject
    private UserTransaction utx;                                     (2)

    public User getForUsername(String username) {                    (3)
        try {
            User user;
            try {
                utx.begin();
                Query query = entityManager.createQuery("select u from User u where u.username = :username");
                query.setParameter("username", username);
                user = (User) query.getSingleResult();
            } catch (NoResultException e) {
                user = null;
            }
            utx.commit();
            return user;
        } catch (Exception e) {
            try {
                utx.rollback();
            } catch (SystemException se) {
                throw new RuntimeException(se);
            }
            throw new RuntimeException(e);
        }
    }

    public void createUser(User user) {                              (4)
        try {
            try {
                utx.begin();
                entityManager.persist(user);
            } finally {
                utx.commit();
            }
        } catch (Exception e) {
            try {
                utx.rollback();
            } catch (SystemException se) {
                throw new RuntimeException(se);
            }
            throw new RuntimeException(e);
        }
    }
}| 1 | We inject the entity manager. This was set up in persistence.xml. |
| 2 | We inject the UserTransaction, to allow us to programmatically control the transaction |
| 3 | The getUserForUsername method can check whether a user with a matching username and password exists, and return it if it does. |
| 4 | createUser persists a new user to the database. |
You’ve probably noticed two things as you’ve read through this. Firstly, that manually managing transactions is a real pain. Secondly, you may be wondering how the entity manager and the logger are injected. First, let’s tidy up the transaction manager, and use EJB to provide us with declarative transaction support.
The class EJBUserDao provides this, and is defined as an alternative. Alternatives are disabled by default, and when enabled replace the original implementation. In order to enable this variant of UserDao, edit beans.xml and uncomment the alternative. Your beans.xml should now look like:
<beans xmlns="http://java.sun.com/xml/ns/javaee"
    xmlns:xsi="http://www.w3.org/2001/XMLSchema-instance"
    xsi:schemaLocation="
        http://java.sun.com/xml/ns/javaee
        http://java.sun.com/xml/ns/javaee/beans_1_0.xsd">

        <!-- Uncomment this alternative to see EJB declarative transactions in use -->
        <alternatives>
            <class>org.jboss.as.quickstarts.greeter.domain.EJBUserDao</class>
        </alternatives>
</beans>
Now, let’s look at EJBUserDao:
@Stateful
@Alternative
public class EJBUserDao implements UserDao {

    @Inject
    private EntityManager entityManager;

    public User getForUsername(String username) {
        try {
            Query query = entityManager.createQuery("select u from User u where u.username = ?");
            query.setParameter(1, username);
            return (User) query.getSingleResult();
        } catch (NoResultException e) {
            return null;
        }
    }

    public void createUser(User user) {
        entityManager.persist(user);
    }

}
Using declarative transaction management has allowed us to remove a third of the lines of code from the class, but more importantly emphasizes the functionality of the class. Much better!
|
Sharp eyed developers who are used to Java EE will have noticed that we have added this EJB to a war. This is the key improvement offered in EJB 3.1 (which was first included in Java EE 6). |
Finally, let’s take a look at the Resources class, which provides resources such as the entity manager. CDI recommends using "resource producers", as we do in this quickstart, to alias resources to CDI beans, allowing for a consistent style throughout our application:
public class Resources {

    // Expose an entity manager using the resource producer pattern
    @SuppressWarnings("unused")
    @PersistenceContext
    @Produces
    private EntityManager em;                                        (1)

    @Produces
    Logger getLogger(InjectionPoint ip) {                            (2)
        String category = ip.getMember()
                            .getDeclaringClass()
                            .getName();
        return Logger.getLogger(category);
    }

    @Produces
    FacesContext getFacesContext() {                                 (3)
        return FacesContext.getCurrentInstance();
    }

}| 1 | We use the "resource producer" pattern, from CDI, to "alias" the old fashioned @PersistenceContext injection of the entity manager to a CDI style injection. This allows us to use a consistent injection style (@Inject) throughout the application. |
| 2 | We expose a JDK logger for injection. In order to save a bit more boiler plate, we automatically set the logger category as the class name! |
| 3 | We expose the FacesContext via a producer method, which allows it to be injected. If we were adding tests, we could also then mock it out. |
That concludes our tour of the greeter application!
6. CDI + JSF + EJB + JTA + Bean Validation + JAX-RS + Arquillian: Kitchensink quickstart
This quickstart shows off all the new features of Java EE 6, and makes a great starting point for your project.
|
Bean Validation
Bean Validation is a new specification in Java EE 6, inspired by Hibernate Validator. It allows application developers to specify constraints once (often in their domain model), and have them applied in all layers of the application, protecting data and giving useful feedback to users. |
|
JAX-RS: The Java API for RESTful Web Services
JAX-RS is a new specification in Java EE 6. It allows application developers to easily expose Java services as RESTful web services. |
Switch to the quickstarts/kitchensink directory and instruct Maven to build and deploy the application:
mvn package wildfly:deploy
The quickstart uses a Maven plugin to deploy the application. The plugin requires JBoss WildFly to be running (you can find out how to start the server in Installing and starting the JBoss server on Linux, Unix or Mac OS X or Installing and starting the JBoss server on Windows).
Or you can start the server using an IDE, like Eclipse.
Now, check if the application has deployed properly by clicking http://localhost:8080/wildfly-kitchensink. If you see a splash page it’s all working!
|
Should you wish to undeploy the quickstart, or redeploy after making some changes, it’s pretty easy:
|
It’s time to pull the covers back and dive into the internals of the application.
6.1. Deploying the Kitchensink quickstart using JBoss Developer Studio, or Eclipse with JBoss Tools
You may choose to deploy the quickstart using JBoss Developer Studio, or Eclipse with JBoss Tools. You’ll need to have JBoss WildFly started in the IDE (as described in Starting the JBoss server from JBDS or Eclipse with JBoss Tools) and to have imported the quickstarts into Eclipse (as described in Importing the quickstarts into Eclipse).
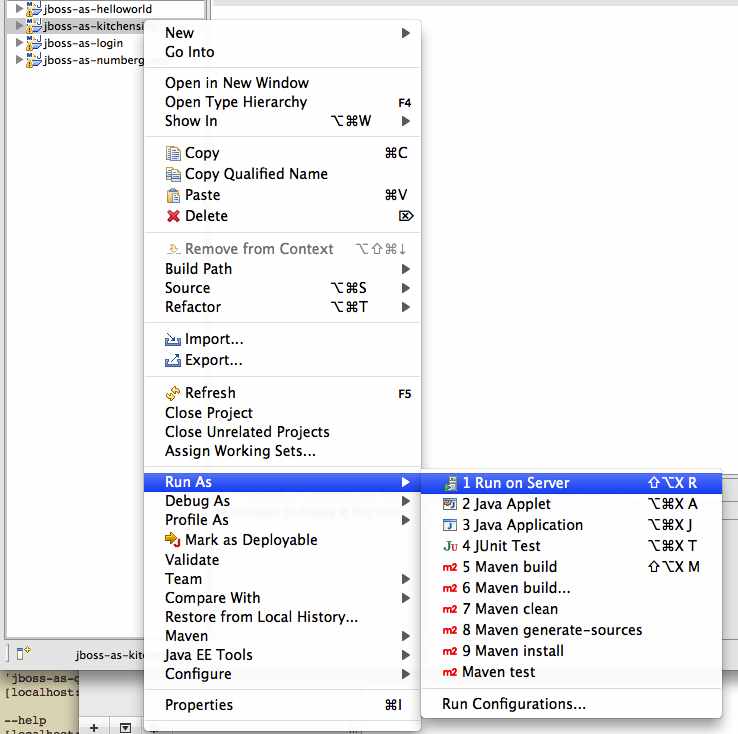
With the quickstarts imported, you can deploy the quickstart by right clicking on the wildfly-kitchensink project, and choosing Run As → Run On Server:
Make sure the server is selected, and hit Finish:
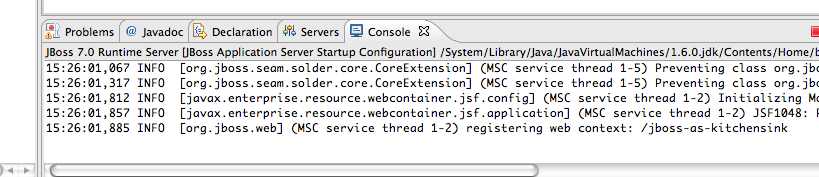
You should see the server start up (unless you already started it in Starting the JBoss server from JBDS or Eclipse with JBoss Tools) and the application deploy in the Console log:
6.2. The kitchensink quickstart in depth
The kitchensink application shows off a number of Java EE technologies such as CDI, JSF, EJB, JTA, JAX-RS and Arquillian. It does this by providing a member registration database, available via JSF and JAX-RS.
As usual, let’s start by looking at the necessary deployment descriptors. By now, we’re very used to seeing beans.xml and faces-config.xml in WEB-INF/ (which can be found in the src/main/webapp directory). Notice that, once again, we don’t need a web.xml. There are two configuration files in WEB-INF/classes/META-INF (which can be found in the src/main/resources directory) — persistence.xml, which sets up JPA, and import.sql which Hibernate, the JPA provider in JBoss WildFly, will use to load the initial users into the application when the application starts. We discussed both of these files in detail in the Greeter Quickstart, and these are largely the same.
Next, let’s take a look at the JSF view the user sees. As usual, we use a template to provide the sidebar and footer. This one lives in src/main/webapp/WEB-INF/templates/default.xhtml:
<!DOCTYPE html PUBLIC "-//W3C//DTD XHTML 1.0 Strict//EN"
    "http://www.w3.org/TR/xhtml1/DTD/xhtml1-strict.dtd">
<html xmlns="http://www.w3.org/1999/xhtml"
    xmlns:h="http://java.sun.com/jsf/html"
    xmlns:ui="http://java.sun.com/jsf/facelets">
<h:head>                                                             (1)
    <title>kitchensink</title>
    <meta http-equiv="Content-Type"
          content="text/html; charset=utf-8" />
    <h:outputStylesheet name="css/screen.css" />
</h:head>
<h:body>
    <div id="container">
        <div class="dualbrand">
            <img src="resources/gfx/dualbrand_logo.png" />
        </div>
        <div id="content">
            <ui:insert name="content">                               (2)
                 [Template content will be inserted here]
            </ui:insert>
        </div>
        <div id="aside">                                             (3)
            <p>Learn more about JBoss Enterprise Application
                Platform 6.</p>
            <ul>
                <li>
                    <a href="http://red.ht/jbeap-6-docs">
                        Documentation
                    </a>
                </li>
                <li>
                    <a href="http://red.ht/jbeap-6">
                        Product Information
                    </a>
               </li>
            </ul>
            <p>Learn more about JBoss WildFly.</p>
            <ul>
                <li>
                    <a href="http://jboss.org/jdf/quickstarts/wildfly-quickstart/guide">
                        Getting Started Developing Applications Guide
                    </a>
                </li>
                <li>
                    <a href="http://jboss.org/jbossas">
                        Community Project Information
                    </a>
                </li>
            </ul>
        </div>
        <div id="footer">
            <p>
                This project was generated from a Maven archetype from
                JBoss.<br />
            </p>
        </div>
    </div>
</h:body>
</html>| 1 | We have a common <head> element, where we define styles and more |
| 2 | The content is inserted here, and defined by views using this template |
| 3 | This application defines a common sidebar and footer, putting them in the template means we only have to define them once |
That leaves the main page, index.xhtml , in which we place the content unique to the main page:
<?xml version="1.0" encoding="UTF-8"?>
<ui:composition xmlns="http://www.w3.org/1999/xhtml"
    xmlns:ui="http://java.sun.com/jsf/facelets"
    xmlns:f="http://java.sun.com/jsf/core"
    xmlns:h="http://java.sun.com/jsf/html"
    template="/WEB-INF/templates/default.xhtml">
    <ui:define name="content">
        <h1>Welcome to JBoss!</h1>

        <h:form id="reg">                                            (1)
            <h2>Member Registration</h2>
            <p>Enforces annotation-based constraints defined on the
                model class.</p>
            <h:panelGrid columns="3" columnClasses="titleCell">
                <h:outputLabel for="name" value="Name:" />
                <h:inputText id="name" value="#{newMember.name}" />  (2)
                <h:message for="name" errorClass="invalid" />

                <h:outputLabel for="email" value="Email:" />
                <h:inputText id="email"
                             value="#{newMember.email}" />           (2)
                <h:message for="email" errorClass="invalid" />

                <h:outputLabel for="phoneNumber" value="Phone #:" />
                <h:inputText id="phoneNumber"
                             value="#{newMember.phoneNumber}" />     (2)
                <h:message for="phoneNumber" errorClass="invalid" />
            </h:panelGrid>

            <p>
                <h:panelGrid columns="2">
                    <h:commandButton id="register"
                        action="#{memberController.register}"
                        value="Register" styleClass="register" />
                    <h:messages styleClass="messages"
                        errorClass="invalid" infoClass="valid"
                        warnClass="warning" globalOnly="true" />
                </h:panelGrid>
            </p>
        </h:form>
        <h2>Members</h2>
        <h:panelGroup rendered="#{empty members}">
            <em>No registered members.</em>
        </h:panelGroup>
        <h:dataTable var="_member" value="#{members}"
            rendered="#{not empty members}"
            styleClass="simpletablestyle">                           (3)
            <h:column>
                <f:facet name="header">Id</f:facet>
                #{_member.id}
            </h:column>
            <h:column>
                <f:facet name="header">Name</f:facet>
                #{_member.name}
            </h:column>
            <h:column>
                <f:facet name="header">Email</f:facet>
                #{_member.email}
            </h:column>
            <h:column>
                <f:facet name="header">Phone #</f:facet>
                #{_member.phoneNumber}
            </h:column>
            <h:column>
                <f:facet name="header">REST URL</f:facet>
                <a href="#{request.contextPath}/rest/members/#{_member.id}">
                    /rest/members/#{_member.id}
                </a>
            </h:column>
            <f:facet name="footer">
                REST URL for all members:
                    <a href="#{request.contextPath}/rest/members">
                        /rest/members
                    </a>
            </f:facet>
        </h:dataTable>
    </ui:define>
</ui:composition>| 1 | The JSF form allows us to register new users. There should be one already created when the application started. |
| 2 | The application uses Bean Validation to validate data entry. The error messages from Bean Validation are automatically attached to the relevant field by JSF, and adding a messages JSF component will display them. |
| 3 | This application exposes REST endpoints for each registered member. The application helpfully displays the URL to the REST endpoint on this page. |
Next, let’s take a look at the Member entity, before we look at how the application is wired together:
SuppressWarnings("serial")
@Entity                                                              (1)
@XmlRootElement                                                      (2)
@Table(uniqueConstraints = @UniqueConstraint(columnNames = "email"))
public class Member implements Serializable {

    @Id
    @GeneratedValue
    private Long id;

    @NotNull
    @Size(min = 1, max = 25)
    @Pattern(regexp = "[A-Za-z ]*",
             message = "must contain only letters and spaces")       (3)
    private String name;

    @NotNull
    @NotEmpty
    @Email                                                           (4)
    private String email;

    @NotNull
    @Size(min = 10, max = 12)
    @Digits(fraction = 0, integer = 12)                              (5)
    @Column(name = "phone_number")
    private String phoneNumber;

    public Long getId() {
        return id;
    }

    public void setId(Long id) {
        this.id = id;
    }

    public String getName() {
        return name;
    }

    public void setName(String name) {
        this.name = name;
    }

    public String getEmail() {
        return email;
    }

    public void setEmail(String email) {
        this.email = email;
    }

    public String getPhoneNumber() {
        return phoneNumber;
    }

    public void setPhoneNumber(String phoneNumber) {
        this.phoneNumber = phoneNumber;
    }
}| 1 | As usual with JPA, we define that the class is an entity by adding @Entity |
| 2 | Members are exposed as a RESTful service using JAX-RS. We can use JAXB to map the object to XML and to do this we need to add @XmlRootElement |
| 3 | Bean Validation allows constraints to be defined once (on the entity) and applied everywhere. Here we constrain the person’s name to a certain size and regular expression |
| 4 | Hibernate Validator also offers some extra validations such as @Email |
| 5 | @Digits , @NotNull and @Size are further examples of constraints |
Let’s take a look at MemberRepository, which is responsible for interactions with the persistence layer:
@ApplicationScoped                                                   (1)
public class MemberRepository {

    @Inject                                                          (2)
    private EntityManager em;

    public Member findById(Long id) {
        return em.find(Member.class, id);
    }

    public Member findByEmail(String email) {
        CriteriaBuilder cb = em.getCriteriaBuilder();                (3)
        CriteriaQuery<Member> c = cb.createQuery(Member.class);
        Root<Member> member = c.from(Member.class);
        c.select(member).where(cb.equal(member.get("email"), email));
        return em.createQuery(c).getSingleResult();
    }

    public List<Member> findAllOrderedByName() {
        CriteriaBuilder cb = em.getCriteriaBuilder();
        CriteriaQuery<Member> criteria = cb.createQuery(Member.class);
        Root<Member> member = criteria.from(Member.class);
        criteria.select(member).orderBy(cb.asc(member.get("name")));
        return em.createQuery(criteria).getResultList();             (4)
    }
}| 1 | The bean is application scoped, as it is a singleton |
| 2 | The entity manager is injected, to allow interaction with JPA |
| 3 | The JPA criteria api is used to load a member by their unique identifier, their email address |
| 4 | The criteria api can also be used to load lists of entities |
Let’s take a look at MemberListProducer, which is responsible for managing the list of registered members.
@RequestScoped                                                       (1)
public class MemberListProducer {

    @Inject                                                          (2)
    private MemberRepository memberRepository;

    private List<Member> members;

    // @Named provides access the return value via the EL variable
    // name "members" in the UI (e.g. Facelets or JSP view)
    @Produces                                                        (3)
    @Named
    public List<Member> getMembers() {
        return members;
    }

    public void onMemberListChanged(                                 (4)
        @Observes(notifyObserver = Reception.IF_EXISTS)
            final Member member) {
        retrieveAllMembersOrderedByName();
    }

    @PostConstruct
    public void retrieveAllMembersOrderedByName() {
        members = memberRepository.findAllOrderedByName();
    }
}| 1 | This bean is request scoped, meaning that any fields (such as members ) will be stored for the entire request |
| 2 | The MemberRepository is responsible or interactions with the persistence layer |
| 3 | The list of members is exposed as a producer method, it’s also available via EL |
| 4 | The observer method is notified whenever a member is created, removed, or updated. This allows us to refresh the list of members whenever they are needed. This is a good approach as it allows us to cache the list of members, but keep it up to date at the same time |
Let’s now look at MemberRegistration, the service that allows us to create new members:
@Stateless                                                           (1)
public class MemberRegistration {

    @Inject                                                          (2)
    private Logger log;

    @Inject
    private EntityManager em;

    @Inject
    private Event<Member> memberEventSrc;

    public void register(Member member) throws Exception {
        log.info("Registering " + member.getName());
        em.persist(member);
        memberEventSrc.fire(member);                                 (3)
   }
}| 1 | This bean requires transactions as it needs to write to the database. Making this an EJB gives us access to declarative transactions - much simpler than manual transaction control! |
| 2 | Here we inject a JDK logger, defined in the Resources class |
| 3 | An event is sent every time a member is updated. This allows other pieces of code (in this quickstart the member list is refreshed) to react to changes in the member list without any coupling to this class. |
Now, let’s take a look at the Resources class, which provides resources such as the entity manager. CDI recommends using "resource producers", as we do in this quickstart, to alias resources to CDI beans, allowing for a consistent style throughout our application:
public class Resources {
    // use @SuppressWarnings to tell IDE to ignore warnings about
    // field not being referenced directly
    @SuppressWarnings("unused")                                      (1)
    @Produces
    @PersistenceContext
    private EntityManager em;

    @Produces                                                        (2)
    public Logger produceLog(InjectionPoint injectionPoint) {
        return Logger.getLogger(injectionPoint.getMember()
                                              .getDeclaringClass()
                                              .getName());
    }

    @Produces                                                        (3)
    @RequestScoped
    public FacesContext produceFacesContext() {
        return FacesContext.getCurrentInstance();
    }

}| 1 | We use the "resource producer" pattern, from CDI, to "alias" the old fashioned @PersistenceContext injection of the entity manager to a CDI style injection. This allows us to use a consistent injection style (@Inject) throughout the application. |
| 2 | We expose a JDK logger for injection. In order to save a bit more boiler plate, we automatically set the logger category as the class name! |
| 3 | We expose the FacesContext via a producer method, which allows it to be injected. If we were adding tests, we could also then mock it out. |
If you want to define your own datasource, take a look at the Administration and Configuration Guide for JBoss Enterprise Application Platform 6 or the Getting Started Guide.
Of course, we need to allow JSF to interact with the services. The MemberController class is responsible for this:
@Model                                                               (1)
public class MemberController {

    @Inject                                                          (2)
    private FacesContext facesContext;

    @Inject                                                          (3)
    private MemberRegistration memberRegistration;

    @Produces                                                        (4)
    @Named
    private Member newMember;

    @PostConstruct                                                   (5)
    public void initNewMember() {
        newMember = new Member();
    }

    public void register() throws Exception {
        try {
            memberRegistration.register(newMember);                  (6)
            FacesMessage m =
                new FacesMessage(FacesMessage.SEVERITY_INFO,
                                 "Registered!",
                                 "Registration successful");
            facesContext.addMessage(null, m);                        (7)
            initNewMember();                                         (8)
        } catch (Exception e) {
            String errorMessage = getRootErrorMessage(e);
            FacesMessage m =
                new FacesMessage(FacesMessage.SEVERITY_ERROR,
                                 errorMessage,
                                 "Registration unsuccessful");
            facesContext.addMessage(null, m);
        }
    }

    private String getRootErrorMessage(Exception e) {
        // Default to general error message that registration failed.
        String errorMessage = "Registration failed. See server log for more information";
        if (e == null) {
            // This shouldn't happen, but return the default messages
            return errorMessage;
        }

        // Start with the exception and recurse to find the root cause
        Throwable t = e;
        while (t != null) {
            // Get the message from the Throwable class instance
            errorMessage = t.getLocalizedMessage();
            t = t.getCause();
        }
        // This is the root cause message
        return errorMessage;
    }

}| 1 | The MemberController class uses the @Model stereotype, which adds @Named and @RequestScoped to the class |
| 2 | The FacesContext is injected, so that messages can be sent to the user |
| 3 | The MemberRegistration bean is injected, to allow the controller to interact with the database |
| 4 | The Member class is exposed using a named producer field, which allows access from JSF. Note that that the named producer field has dependent scope, so every time it is injected, the field will be read |
| 5 | The @PostConstruct annotation causes a new member object to be placed in the newMember field when the bean is instantiated |
| 6 | When the register method is called, the newMember object is passed to the persistence service |
| 7 | We also send a message to the user, to give them feedback on their actions |
| 8 | Finally, we replace the newMember with a new object, thus blanking out the data the user has added so far. This works as the producer field is dependent scoped |
Before we wrap up our tour of the kitchensink application, let’s take a look at how the JAX-RS endpoints are created. Firstly, JaxRSActivator, which extends Application and is annotated with @ApplicationPath, is the Java EE 6 "no XML" approach to activating JAX-RS.
@ApplicationPath("/rest")
public class JaxRsActivator extends Application {
   /* class body intentionally left blank */
}
The real work goes in MemberResourceRESTService, which produces the endpoint:
@Path("/members")                                                    (1)
@RequestScoped                                                       (2)
public class MemberResourceRESTService {

    @Inject                                                          (3)
    private Logger log;

    @Inject                                                          (4)
    private Validator validator;

    @Inject                                                          (5)
    private MemberRepository repository;

    @Inject                                                          (6)
    private MemberRegistration registration;

    @GET                                                             (7)
    @Produces(MediaType.APPLICATION_JSON)
    public List<Member> listAllMembers() {
        return repository.findAllOrderedByName();
    }

    @GET                                                             (8)
    @Path("/{id:[0-9][0-9]*}")
    @Produces(MediaType.APPLICATION_JSON)
    public Member lookupMemberById(@PathParam("id") long id) {
        Member member = repository.findById(id);
        if (member == null) {
            throw new
                WebApplicationException(Response.Status.NOT_FOUND);
        }
        return member;
    }

    /**
     * Creates a new member from the values provided.  Performs
     * validation, and will return a JAX-RS response with either
     * 200 ok, or with a map of fields, and related errors.
     */
    @POST
    @Consumes(MediaType.APPLICATION_JSON)
    @Produces(MediaType.APPLICATION_JSON)
    public Response createMember(Member member) {                    (9)
        Response.ResponseBuilder builder = null;

        try {
            // Validates member using bean validation
            validateMember(member);                                  (10)

            registration.register(member);                           (11)

            //Create an "ok" response
            builder = Response.ok();
        } catch (ConstraintViolationException ce) {                  (12)
            //Handle bean validation issues
            builder = createViolationResponse(
                          ce.getConstraintViolations());
        } catch (ValidationException e) {
            //Handle the unique constrain violation
            Map<String, String> responseObj =
                new HashMap<String, String>();
            responseObj.put("email", "Email taken");
            builder = Response.status(Response.Status.CONFLICT)
                              .entity(responseObj);
        } catch (Exception e) {
            // Handle generic exceptions
            Map<String, String> responseObj
                = new HashMap<String, String>();
            responseObj.put("error", e.getMessage());
            builder = Response.status(Response.Status.BAD_REQUEST)
                              .entity(responseObj);
        }

        return builder.build();
    }


    /**
     * <p>
     * Validates the given Member variable and throws validation
     * exceptions based on the type of error. If the error is
     * standard bean validation errors then it will throw a
     * ConstraintValidationException with the set of the
     * constraints violated.
     * </p>
     * <p>
     * If the error is caused because an existing member with the
     * same email is registered it throws a regular validation
     * exception so that it can be interpreted separately.
     * </p>
     *
     * @param member Member to be validated
     * @throws ConstraintViolationException
     *     If Bean Validation errors exist
     * @throws ValidationException
     *     If member with the same email already exists
     */
    private void validateMember(Member member)
            throws ConstraintViolationException,
                   ValidationException {
        //Create a bean validator and check for issues.
        Set<ConstraintViolation<Member>> violations =
            validator.validate(member);

        if (!violations.isEmpty()) {
            throw new ConstraintViolationException(
                new HashSet<ConstraintViolation<?>>(violations));
        }

        //Check the uniqueness of the email address
        if (emailAlreadyExists(member.getEmail())) {
            throw new ValidationException("Unique Email Violation");
        }
    }

    /**
     * Creates a JAX-RS "Bad Request" response including a map of
     * all violation fields, and their message. This can then be
     * used by clients to show violations.
     *
     * @param violations A set of violations that needs to be
     *                   reported
     * @return JAX-RS response containing all violations
     */
    private Response.ResponseBuilder createViolationResponse
            (Set<ConstraintViolation<?>> violations) {
        log.fine("Validation completed. violations found: "
            + violations.size());

        Map<String, String> responseObj =
            new HashMap<String, String>();

        for (ConstraintViolation<?> violation : violations) {
            responseObj.put(violation.getPropertyPath().toString(),
                            violation.getMessage());
        }

        return Response.status(Response.Status.BAD_REQUEST)
                       .entity(responseObj);
    }

    /**
     * Checks if a member with the same email address is already
     * registered.  This is the only way to easily capture the
     * "@UniqueConstraint(columnNames = "email")" constraint from
     * the Member class.
     *
     * @param email The email to check
     * @return True if the email already exists, and false
               otherwise
     */
    public boolean emailAlreadyExists(String email) {
        Member member = null;
        try {
            member = repository.findByEmail(email);
        } catch (NoResultException e) {
            // ignore
        }
        return member != null;
    }
}| 1 | The @Path annotation tells JAX-RS that this class provides a REST endpoint mapped to rest/members (concatenating the path from the activator with the path for this endpoint). |
| 2 | The bean is request scoped, as JAX-RS interactions typically don’t hold state between requests |
| 3 | JAX-RS endpoints are CDI enabled, and can use CDI-style injection. |
| 4 | CDI allows us to inject a Bean Validation Validator instance, which is used to validate the POSTed member before it is persisted |
| 5 | MemberRegistration is injected to allow us to alter the member database |
| 6 | MemberRepository is injected to allow us to query the member database |
| 7 | The listAllMembers() method is called when the raw endpoint is accessed and offers up a list of endpoints. Notice that the object is automatically marshalled to JSON by RESTEasy (the JAX-RS implementation included in JBoss WildFly). |
| 8 | The lookupMemberById() method is called when the endpoint is accessed with a member id parameter appended (for example rest/members/1). Again, the object is automatically marshalled to JSON by RESTEasy. |
| 9 | createMember() is called when a POST is performed on the URL. Once again, the object is automatically unmarshalled from JSON. |
| 10 | In order to ensure that the member is valid, we call the validateMember method, which validates the object, and adds any constraint violations to the response. These can then be handled on the client side, and displayed to the user |
| 11 | The object is then passed to the MemberRegistration service to be persisted |
| 12 | We then handle any remaining issues with validating the object, which are raised when the object is persisted |
6.2.1. Arquillian
If you’ve been following along with the Test Driven Development craze of the past few years, you’re probably getting a bit nervous by now, wondering how on earth you are going to test your application. Lucky for you, the Arquillian project is here to help!
Arquillian provides all the boiler plate for running your test inside JBoss WildFly, allowing you to concentrate on testing your application. In order to do that, it utilizes Shrinkwrap, a fluent API for defining packaging, to create an archive to deploy. We’ll go through the testcase, and how you configure Arquillian in just a moment, but first let’s run the test.
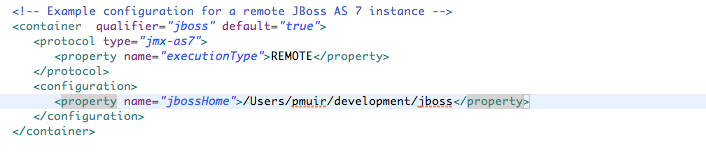
Before we start, we need to let Arquillian know the path to our server. Open up src/test/resources/arquillian.xml, uncomment the <configuration> elements, and set the jbossHome property to the path to the server:
Now, make sure the server is not running (so that the instance started for running the test does not interfere), and then run the tests from the command line by typing:
mvn clean test -Parq-managed
You should see the server start up, a test.war deployed, test executed, and then the results displayed to you on the console:
$ > mvn clean test -Parq-managed


[INFO] Scanning for projects...
[INFO]
[INFO] ------------------------------------------------------------------------
[INFO] Building WildFly Quickstarts: Kitchensink 7.0.0-SNAPSHOT
[INFO] ------------------------------------------------------------------------
[INFO]
[INFO] --- maven-clean-plugin:2.4.1:clean (default-clean) @ wildfly-kitchensink ---
[INFO] Deleting /Users/pmuir/workspace/wildfly-docs/quickstarts/kitchensink/target
[INFO]
[INFO] --- maven-resources-plugin:2.4.3:resources (default-resources) @ wildfly-kitchensink ---
[INFO] Using 'UTF-8' encoding to copy filtered resources.
[INFO] Copying 2 resources
[INFO]
[INFO] --- maven-compiler-plugin:2.3.1:compile (default-compile) @ wildfly-kitchensink ---
[INFO] Compiling 6 source files to /Users/pmuir/workspace/wildfly-docs/quickstarts/kitchensink/target/classes
[INFO]
[INFO] --- maven-resources-plugin:2.4.3:testResources (default-testResources) @ wildfly-kitchensink ---
[INFO] Using 'UTF-8' encoding to copy filtered resources.
[INFO] Copying 1 resource
[INFO]
[INFO] --- maven-compiler-plugin:2.3.1:testCompile (default-testCompile) @ wildfly-kitchensink ---
[INFO] Compiling 1 source file to /Users/pmuir/workspace/wildfly-docs/quickstarts/kitchensink/target/test-classes
[INFO]
[INFO] --- maven-surefire-plugin:2.7.2:test (default-test) @ wildfly-kitchensink ---
[INFO] Surefire report directory: /Users/pmuir/workspace/wildfly-docs/quickstarts/kitchensink/target/surefire-reports

-------------------------------------------------------
 T E S T S
-------------------------------------------------------
Running org.jboss.as.quickstarts.kitchensink.test.MemberRegistrationTest
Jun 25, 2011 7:17:49 PM org.jboss.arquillian.container.impl.client.container.ContainerRegistryCreator getActivatedConfiguration
INFO: Could not read active container configuration: null
log4j:WARN No appenders could be found for logger (org.jboss.remoting).
log4j:WARN Please initialize the log4j system properly.
Jun 25, 2011 7:17:54 PM org.jboss.as.arquillian.container.managed.ManagedDeployableContainer startInternal
INFO: Starting container with: [java, -Djboss.home.dir=/Users/pmuir/development/jboss, -Dorg.jboss.boot.log.file=/Users/pmuir/development/jboss/standalone/log/boot.log, -Dlogging.configuration=file:/Users/pmuir/development/jboss/standalone/configuration/logging.properties, -jar, /Users/pmuir/development/jboss/jboss-modules.jar, -mp, /Users/pmuir/development/jboss/modules, -logmodule, org.jboss.logmanager, -jaxpmodule, javax.xml.jaxp-provider, org.jboss.as.standalone, -server-config, standalone.xml]
19:17:55,107 INFO  [org.jboss.modules] JBoss Modules version 1.0.0.CR4
19:17:55,329 INFO  [org.jboss.msc] JBoss MSC version 1.0.0.CR2
19:17:55,386 INFO  [org.jboss.as] JBoss WildFly.0.0.Beta4-SNAPSHOT "(TBD)" starting
19:17:56,159 INFO  [org.jboss.as] creating http management service using network interface (management) port (9990) securePort (-1)
19:17:56,181 INFO  [org.jboss.as.logging] Removing bootstrap log handlers
19:17:56,189 INFO  [org.jboss.as.naming] (Controller Boot Thread) Activating Naming Subsystem
19:17:56,203 INFO  [org.jboss.as.naming] (MSC service thread 1-4) Starting Naming Service
19:17:56,269 INFO  [org.jboss.as.security] (Controller Boot Thread) Activating Security Subsystem
19:17:56,305 INFO  [org.jboss.remoting] (MSC service thread 1-1) JBoss Remoting version 3.2.0.Beta2
19:17:56,317 INFO  [org.xnio] (MSC service thread 1-1) XNIO Version 3.0.0.Beta3
19:17:56,331 INFO  [org.xnio.nio] (MSC service thread 1-1) XNIO NIO Implementation Version 3.0.0.Beta3
19:17:56,522 INFO  [org.jboss.as.connector.subsystems.datasources] (Controller Boot Thread) Deploying JDBC-compliant driver class org.h2.Driver (version 1.2)
19:17:56,572 INFO  [org.apache.catalina.core.AprLifecycleListener] (MSC service thread 1-7) The Apache Tomcat Native library which allows optimal performance in production environments was not found on the java.library.path: .:/Library/Java/Extensions:/System/Library/Java/Extensions:/usr/lib/java
19:17:56,627 INFO  [org.jboss.as.remoting] (MSC service thread 1-3) Listening on /127.0.0.1:9999
19:17:56,641 INFO  [org.jboss.as.jmx.JMXConnectorService] (MSC service thread 1-2) Starting remote JMX connector
19:17:56,705 INFO  [org.jboss.as.ee] (Controller Boot Thread) Activating EE subsystem
19:17:56,761 INFO  [org.apache.coyote.http11.Http11Protocol] (MSC service thread 1-7) Starting Coyote HTTP/1.1 on http--127.0.0.1-8080
19:17:56,793 INFO  [org.jboss.as.connector] (MSC service thread 1-3) Starting JCA Subsystem (JBoss IronJacamar 1.0.0.CR2)
19:17:56,837 INFO  [org.jboss.as.connector.subsystems.datasources] (MSC service thread 1-2) Bound data source [java:jboss/datasources/ExampleDS]
19:17:57,335 INFO  [org.jboss.as.server.deployment] (MSC service thread 1-1) Starting deployment of "arquillian-service"
19:17:57,348 INFO  [org.jboss.as.deployment] (MSC service thread 1-7) Started FileSystemDeploymentService for directory /Users/pmuir/development/jboss/standalone/deployments
19:17:57,693 INFO  [org.jboss.as] (Controller Boot Thread) JBoss WildFly.0.0.Beta4-SNAPSHOT "(TBD)" started in 2806ms - Started 111 of 138 services (27 services are passive or on-demand)
19:18:00,596 INFO  [org.jboss.as.server.deployment] (MSC service thread 1-6) Stopped deployment arquillian-service in 8ms
19:18:01,394 INFO  [org.jboss.as.server.deployment] (pool-2-thread-7) Content added at location /Users/pmuir/development/jboss/standalone/data/content/0a/9e20b7bc978fd2778b89c7c06e4d3e1f308dfe/content
19:18:01,403 INFO  [org.jboss.as.server.deployment] (MSC service thread 1-7) Starting deployment of "arquillian-service"
19:18:01,650 INFO  [org.jboss.as.server.deployment] (pool-2-thread-6) Content added at location /Users/pmuir/development/jboss/standalone/data/content/94/8324ab8f5a693c67fa57b59323304d3947bbf6/content
19:18:01,659 INFO  [org.jboss.as.server.deployment] (MSC service thread 1-5) Starting deployment of "test.war"
19:18:01,741 INFO  [org.jboss.jpa] (MSC service thread 1-7) read persistence.xml for primary
19:18:01,764 INFO  [org.jboss.weld] (MSC service thread 1-3) Processing CDI deployment: test.war
19:18:01,774 INFO  [org.jboss.as.ejb3.deployment.processors.EjbJndiBindingsDeploymentUnitProcessor] (MSC service thread 1-3) JNDI bindings for session bean named MemberRegistration in deployment unit deployment "test.war" are as follows:

        java:global/test/MemberRegistration!org.jboss.as.quickstarts.kitchensink.controller.MemberRegistration
        java:app/test/MemberRegistration!org.jboss.as.quickstarts.kitchensink.controller.MemberRegistration
        java:module/MemberRegistration!org.jboss.as.quickstarts.kitchensink.controller.MemberRegistration
        java:global/test/MemberRegistration
        java:app/test/MemberRegistration
        java:module/MemberRegistration

19:18:01,908 INFO  [org.jboss.weld] (MSC service thread 1-5) Starting Services for CDI deployment: test.war
19:18:02,131 INFO  [org.jboss.weld.Version] (MSC service thread 1-5) WELD-000900 1.1.1 (Final)
19:18:02,169 INFO  [org.jboss.weld] (MSC service thread 1-2) Starting weld service
19:18:02,174 INFO  [org.jboss.as.arquillian] (MSC service thread 1-3) Arquillian deployment detected: ArquillianConfig[service=jboss.arquillian.config."test.war",unit=test.war,tests=[org.jboss.as.quickstarts.kitchensink.test.MemberRegistrationTest]]
19:18:02,179 INFO  [org.jboss.jpa] (MSC service thread 1-6) starting Persistence Unit Service 'test.war#primary'
19:18:02,322 INFO  [org.hibernate.annotations.common.Version] (MSC service thread 1-6) Hibernate Commons Annotations 3.2.0.Final
19:18:02,328 INFO  [org.hibernate.cfg.Environment] (MSC service thread 1-6) HHH00412:Hibernate [WORKING]
19:18:02,330 INFO  [org.hibernate.cfg.Environment] (MSC service thread 1-6) HHH00206:hibernate.properties not found
19:18:02,332 INFO  [org.hibernate.cfg.Environment] (MSC service thread 1-6) HHH00021:Bytecode provider name : javassist
19:18:02,354 INFO  [org.hibernate.ejb.Ejb3Configuration] (MSC service thread 1-6) HHH00204:Processing PersistenceUnitInfo [
	name: primary
	...]
19:18:02,400 WARN  [org.hibernate.cfg.AnnotationBinder] (MSC service thread 1-6) HHH00194:Package not found or wo package-info.java: org.jboss.as.quickstarts.kitchensink.test
19:18:02,400 WARN  [org.hibernate.cfg.AnnotationBinder] (MSC service thread 1-6) HHH00194:Package not found or wo package-info.java: org.jboss.as.quickstarts.kitchensink.controller
19:18:02,401 WARN  [org.hibernate.cfg.AnnotationBinder] (MSC service thread 1-6) HHH00194:Package not found or wo package-info.java: org.jboss.as.quickstarts.kitchensink.util
19:18:02,401 WARN  [org.hibernate.cfg.AnnotationBinder] (MSC service thread 1-6) HHH00194:Package not found or wo package-info.java: org.jboss.as.quickstarts.kitchensink.model
19:18:02,592 INFO  [org.hibernate.service.jdbc.connections.internal.ConnectionProviderInitiator] (MSC service thread 1-6) HHH00130:Instantiating explicit connection provider: org.hibernate.ejb.connection.InjectedDataSourceConnectionProvider
19:18:02,852 INFO  [org.hibernate.dialect.Dialect] (MSC service thread 1-6) HHH00400:Using dialect: org.hibernate.dialect.H2Dialect
19:18:02,858 WARN  [org.hibernate.dialect.H2Dialect] (MSC service thread 1-6) HHH00431:Unable to determine H2 database version, certain features may not work
19:18:02,862 INFO  [org.hibernate.engine.jdbc.internal.LobCreatorBuilder] (MSC service thread 1-6) HHH00423:Disabling contextual LOB creation as JDBC driver reported JDBC version [3] less than 4
19:18:02,870 INFO  [org.hibernate.engine.transaction.internal.TransactionFactoryInitiator] (MSC service thread 1-6) HHH00268:Transaction strategy: org.hibernate.engine.transaction.internal.jta.CMTTransactionFactory
19:18:02,874 INFO  [org.hibernate.hql.internal.ast.ASTQueryTranslatorFactory] (MSC service thread 1-6) HHH00397:Using ASTQueryTranslatorFactory
19:18:02,911 INFO  [org.hibernate.validator.util.Version] (MSC service thread 1-6) Hibernate Validator 4.1.0.Final
19:18:02,917 INFO  [org.hibernate.validator.engine.resolver.DefaultTraversableResolver] (MSC service thread 1-6) Instantiated an instance of org.hibernate.validator.engine.resolver.JPATraversableResolver.
19:18:03,079 INFO  [org.hibernate.tool.hbm2ddl.SchemaExport] (MSC service thread 1-6) HHH00227:Running hbm2ddl schema export
19:18:03,093 INFO  [org.hibernate.tool.hbm2ddl.SchemaExport] (MSC service thread 1-6) HHH00230:Schema export complete
19:18:03,217 INFO  [org.jboss.web] (MSC service thread 1-5) registering web context: /test
19:18:03,407 WARN  [org.jboss.weld.Bean] (RMI TCP Connection(3)-127.0.0.1) WELD-000018 Executing producer field or method [method] @Produces public org.jboss.as.quickstarts.kitchensink.test.MemberRegistrationTest.produceLog(InjectionPoint) on incomplete declaring bean Managed Bean [class org.jboss.as.quickstarts.kitchensink.test.MemberRegistrationTest] with qualifiers [@Any @Default] due to circular injection
19:18:03,427 WARN  [org.jboss.weld.Bean] (RMI TCP Connection(3)-127.0.0.1) WELD-000018 Executing producer field or method [method] @Produces public org.jboss.as.quickstarts.kitchensink.test.MemberRegistrationTest.produceLog(InjectionPoint) on incomplete declaring bean Managed Bean [class org.jboss.as.quickstarts.kitchensink.test.MemberRegistrationTest] with qualifiers [@Any @Default] due to circular injection
19:18:03,450 WARN  [org.jboss.as.ejb3.component.EJBComponent] (RMI TCP Connection(3)-127.0.0.1) EJBTHREE-2120: deprecated getTransactionAttributeType method called (dev problem)
19:18:03,459 INFO  [org.jboss.as.quickstarts.kitchensink.controller.MemberRegistration] (RMI TCP Connection(3)-127.0.0.1) Registering Jane Doe
19:18:03,616 INFO  [org.jboss.as.quickstarts.kitchensink.test.MemberRegistrationTest] (RMI TCP Connection(3)-127.0.0.1) Jane Doe was persisted with id 1
19:18:03,686 INFO  [org.jboss.jpa] (MSC service thread 1-1) stopping Persistence Unit Service 'test.war#primary'
19:18:03,687 INFO  [org.hibernate.tool.hbm2ddl.SchemaExport] (MSC service thread 1-1) HHH00227:Running hbm2ddl schema export
19:18:03,690 INFO  [org.jboss.weld] (MSC service thread 1-3) Stopping weld service
19:18:03,692 INFO  [org.hibernate.tool.hbm2ddl.SchemaExport] (MSC service thread 1-1) HHH00230:Schema export complete
19:18:03,704 INFO  [org.jboss.as.server.deployment] (MSC service thread 1-8) Stopped deployment test.war in 52ms
Tests run: 1, Failures: 0, Errors: 0, Skipped: 0, Time elapsed: 14.859 sec

Results :

Tests run: 1, Failures: 0, Errors: 0, Skipped: 0

[INFO] ------------------------------------------------------------------------
[INFO] BUILD SUCCESS
[INFO] ------------------------------------------------------------------------
[INFO] Total time: 22.305s
[INFO] Finished at: Sat Jun 25 19:18:04 BST 2011
[INFO] Final Memory: 17M/125M
[INFO] ------------------------------------------------------------------------
As you can see, that didn’t take too long (approximately 15s), and is great for running in your QA environment, but if you running locally, you might prefer to connect to a running server. To do that, start up JBoss WildFly (as described in Getting Started with JBoss Enterprise Application Platform of WildFly. Now, run your test, but use the arq-wildfly-remote profile:
mvn clean test -Parq-remote
$ > mvn clean test -Parq-remote


[INFO] Scanning for projects...
[INFO]
[INFO] ------------------------------------------------------------------------
[INFO] Building WildFly Quickstarts: Kitchensink 7.0.0-SNAPSHOT
[INFO] ------------------------------------------------------------------------
[INFO]
[INFO] --- maven-clean-plugin:2.4.1:clean (default-clean) @ wildfly-kitchensink ---
[INFO] Deleting /Users/pmuir/workspace/wildfly-docs/quickstarts/kitchensink/target
[INFO]
[INFO] --- maven-resources-plugin:2.4.3:resources (default-resources) @ wildfly-kitchensink ---
[INFO] Using 'UTF-8' encoding to copy filtered resources.
[INFO] Copying 2 resources
[INFO]
[INFO] --- maven-compiler-plugin:2.3.1:compile (default-compile) @ wildfly-kitchensink ---
[INFO] Compiling 6 source files to /Users/pmuir/workspace/wildfly-docs/quickstarts/kitchensink/target/classes
[INFO]
[INFO] --- maven-resources-plugin:2.4.3:testResources (default-testResources) @ wildfly-kitchensink ---
[INFO] Using 'UTF-8' encoding to copy filtered resources.
[INFO] Copying 1 resource
[INFO]
[INFO] --- maven-compiler-plugin:2.3.1:testCompile (default-testCompile) @ wildfly-kitchensink ---
[INFO] Compiling 1 source file to /Users/pmuir/workspace/wildfly-docs/quickstarts/kitchensink/target/test-classes
[INFO]
[INFO] --- maven-surefire-plugin:2.7.2:test (default-test) @ wildfly-kitchensink ---
[INFO] Surefire report directory: /Users/pmuir/workspace/wildfly-docs/quickstarts/kitchensink/target/surefire-reports

------------------------------------------------------
 T E S T S
-------------------------------------------------------
Running org.jboss.as.quickstarts.kitchensink.test.MemberRegistrationTest
Jun 25, 2011 7:22:28 PM org.jboss.arquillian.container.impl.client.container.ContainerRegistryCreator getActivatedConfiguration
INFO: Could not read active container configuration: null
log4j:WARN No appenders could be found for logger (org.jboss.as.arquillian.container.MBeanServerConnectionProvider).
log4j:WARN Please initialize the log4j system properly.
Tests run: 1, Failures: 0, Errors: 0, Skipped: 0, Time elapsed: 4.13 sec

Results :

Tests run: 1, Failures: 0, Errors: 0, Skipped: 0

[INFO] ------------------------------------------------------------------------
[INFO] BUILD SUCCESS
[INFO] ------------------------------------------------------------------------
[INFO] Total time: 10.474s
[INFO] Finished at: Sat Jun 25 19:22:33 BST 2011
[INFO] Final Memory: 17M/125M
[INFO] ------------------------------------------------------------------------
$ >
|
Arquillian defines two modes, managed and remote . The managed mode will take care of starting and stopping the server for you, whilst the remote mode connects to an already running server. |
This time you can see the test didn’t start the server (if you check the instance you started, you will see the application was deployed there), and the test ran a lot faster (approximately 4s).
We can also run the test from Eclipse, in both managed and remote modes. First, we’ll run in in managed mode. In order to set up the correct dependencies on your classpath, right click on the project, and select Properties :

Now, locate the Maven panel:
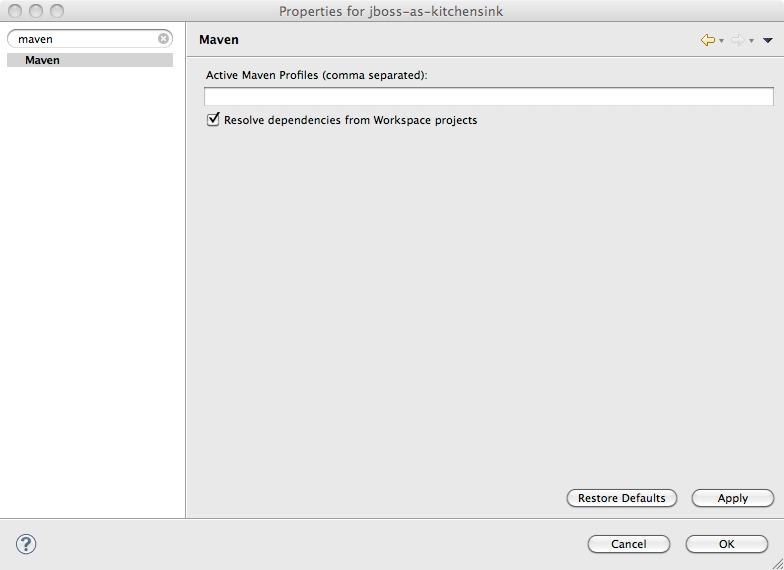
And activate the arq-managed profile:
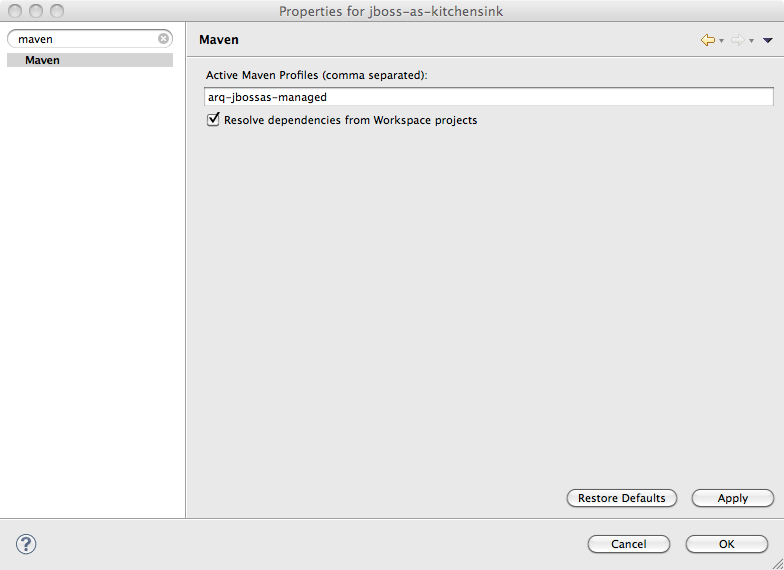
Finally, hit Ok, and then confirm you want to update the project configuration:
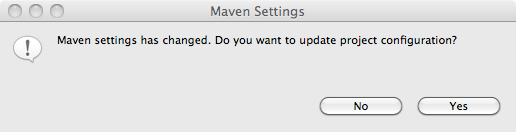
Once the project has built, locate the MemberRegistrationTest in src/test/java, right click on the test, and choose Run As → JUnit Test…`:
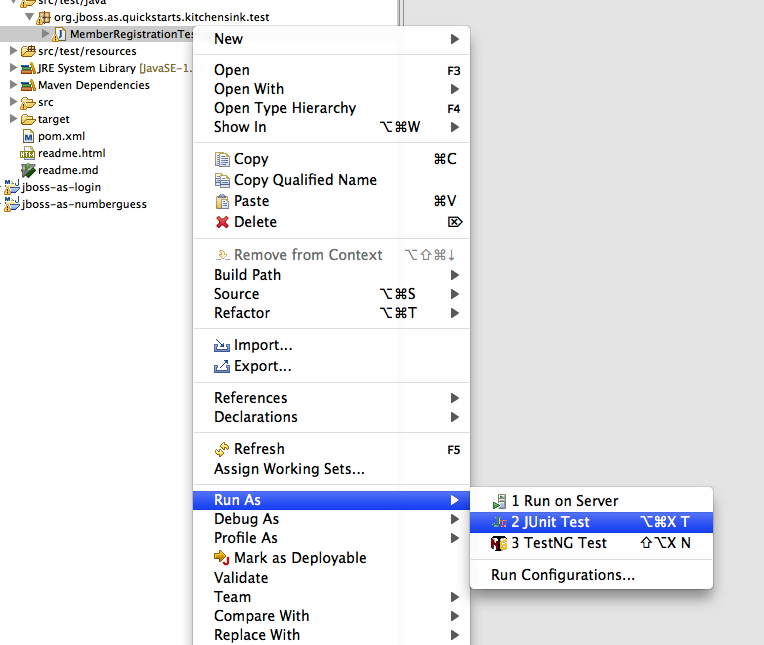
You should see the server start in the Eclipse Console, the test be deployed, and finally the JUnit View pop up with the result (a pass of course!).
We can also run the test in an already running instance of Eclipse. Simply change the active profile to arq-remote:
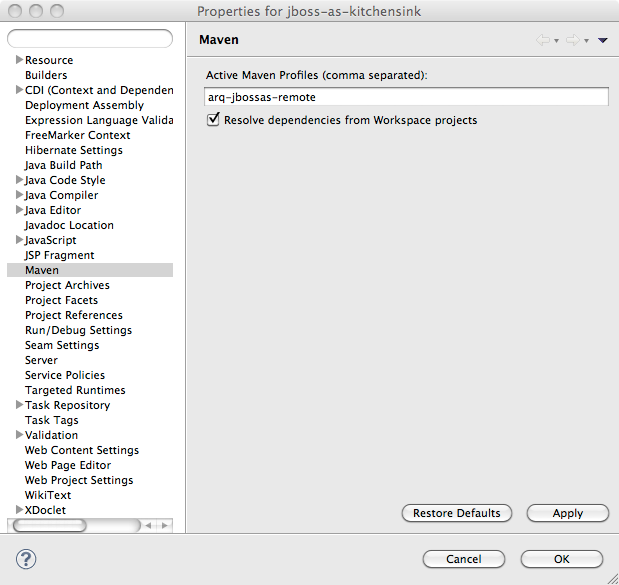
Now, make sure the server is running, right click on the test case and choose Run As → JUnit Test…:
Again, you’ll see the test run in the server, and the JUnit View pop up, with the test passing.
So far so good, the test is running in both Eclipse and from the command line. But what does the test look like?
@RunWith(Arquillian.class)                                           (1)
public class MemberRegistrationTest {
    @Deployment                                                      (2)
    public static Archive<?> createTestArchive() {
        return ShrinkWrap.create(WebArchive.class, "test.war")
                .addClasses(Member.class,
                            MemberRegistration.class,
                            Resources.class)                         (3)
                .addAsResource("META-INF/test-persistence.xml",
                               "META-INF/persistence.xml")           (4)
                .addAsWebInfResource(EmptyAsset.INSTANCE,
                                     "beans.xml")                    (5)
                // Deploy our test datasource
                .addAsWebInfResource("test-ds.xml");                 (6)
    }

    @Inject                                                          (7)
    MemberRegistration memberRegistration;

    @Inject
    Logger log;

    @Test
    public void testRegister() throws Exception {                    (8)
        Member newMember = new Member();
        newMember.setName("Jane Doe");
        newMember.setEmail("jane@mailinator.com");
        newMember.setPhoneNumber("2125551234");
        memberRegistration.register(newMember);
        assertNotNull(newMember.getId());
        log.info(newMember.getName() +
                 " was persisted with id " +
                 newMember.getId());
    }

}| 1 | @RunWith(Arquillian.class) tells JUnit to hand control over to Arquillian when executing tests |
| 2 | The @Deployment annotation identifies the createTestArchive() static method to Arquillian as the one to use to determine which resources and classes to deploy |
| 3 | We add just the classes needed for the test, no more |
| 4 | We also add persistence.xml as our test is going to use the database |
| 5 | Of course, we must add beans.xml to enable CDI |
| 6 | Finally, we add a test datasource, so that test data doesn’t overwrite production data |
| 7 | Arquillian allows us to inject beans into the test case |
| 8 | The test method works as you would expect - creates a new member, registers them, and then verifies that the member was created |
As you can see, Arquillian has lived up to the promise - the test case is focused on what to test (the @Deployment method) and how to test (the @Test method). It’s also worth noting that this isn’t a simplistic unit test - this is a fully fledged integration test that uses the database.
Now, let’s look at how we configure Arquillian. First of all, let’s take a look at arquillian.xml in src/test/resources.
<arquillian xmlns="http://jboss.org/schema/arquillian"
   xmlns:xsi="http://www.w3.org/2001/XMLSchema-instance"
   xsi:schemaLocation="http://jboss.org/schema/arquillian
        http://jboss.org/schema/arquillian/arquillian_1_0.xsd">

   <!-- Uncomment to have test archives exported to the
        file system for inspection -->
<!--    <engine>  -->                                                (1)
<!--       <property name="deploymentExportPath">
               target/
           </property>  -->
<!--    </engine> -->

   <!-- Force the use of the Servlet 3.0 protocol with all
        containers, as it is the most mature -->
   <defaultProtocol type="Servlet 3.0" />                            (2)

   <!-- Example configuration for a remote JBoss WildFly instance -->
   <container qualifier="jboss" default="true">
      <!-- If you want to use the JBOSS_HOME environment variable,
           just delete the jbossHome property -->
      <configuration>
         <property name="jbossHome">/path/to/wildfly</property>
      </configuration>
   </container>

</arquillian>| 1 | Arquillian deploys the test war, and doesn’t write it to disk. For debugging, it can be very useful to see exactly what is in your war, so Arquillian allows you to export the war when the tests runs |
| 2 | Arquillian currently needs configuring to use the Servlet protocol to connect to the server |
Now, we need to look at how we select between containers in the pom.xml:
<profile>
    <!-- An optional Arquillian testing profile that executes tests
        in your WildFly instance -->
    <!-- This profile will start a new WildFly instance, and
        execute the test, shutting it down when done -->
    <!-- Run with: mvn clean test -Parq-managed -->
    <id>arq-wildfly-managed</id>                                     (1)
    <dependencies>
        <dependency>
            <groupId>org.jboss.as</groupId>
            <artifactId>                                             (2)
                wildfly-arquillian-container-managed
            </artifactId>
            <scope>test</scope>
        </dependency>
    </dependencies>
</profile>

<profile>
    <!-- An optional Arquillian testing profile that executes
        tests in a remote WildFly instance -->
    <!-- Run with: mvn clean test -Parq-remote -->
    <id>arq-wildfly-remote</id>
    <dependencies>
        <dependency>
            <groupId>org.jboss.as</groupId>
            <artifactId>                                             (3)
                wildfly-arquillian-container-remote
            </artifactId>
            <scope>test</scope>
        </dependency>
    </dependencies>
</profile>
<1>The profile needs an id so we can activate from Eclipse or the command line <2> Arquillian decides which container to use depending on your classpath. Here we define the managed container. <3> Arquillian decides which container to use depending on your classpath. Here we define the remote container.
And that’s it! As you can see Arquillian delivers simple and true testing. You can concentrate on writing your test functionality, and run your tests in the same environment in which you will run your application.
|
Arquillian also offers other containers, allowing you to run your tests against Weld Embedded (super fast, but your enterprise services are mocked), GlassFish, and more |
That concludes our tour of the kitchensink quickstart. If you would like to use this project as a basis for your own application, you can of course copy this application sources and modify it.
7. Creating your own application
What we didn’t tell you about the kitchensink quickstart is that it is generated from a Maven archetype. Using this archetype offers you the perfect opportunity to generate your own project.
You can create a project from the archetype using Red Hat JBoss Developer Studio, or Eclipse with JBoss Tools. First, open up JBoss Central, if it isn’t already open. Hit Cmd-3 (Mac) or Ctrl-3 (Windows, Linux) and type JBoss Central:
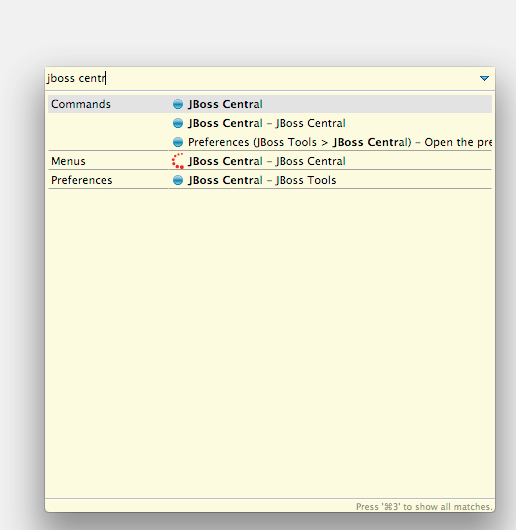
You will now be shown JBoss Central, an excellent place to find about all things JBoss!
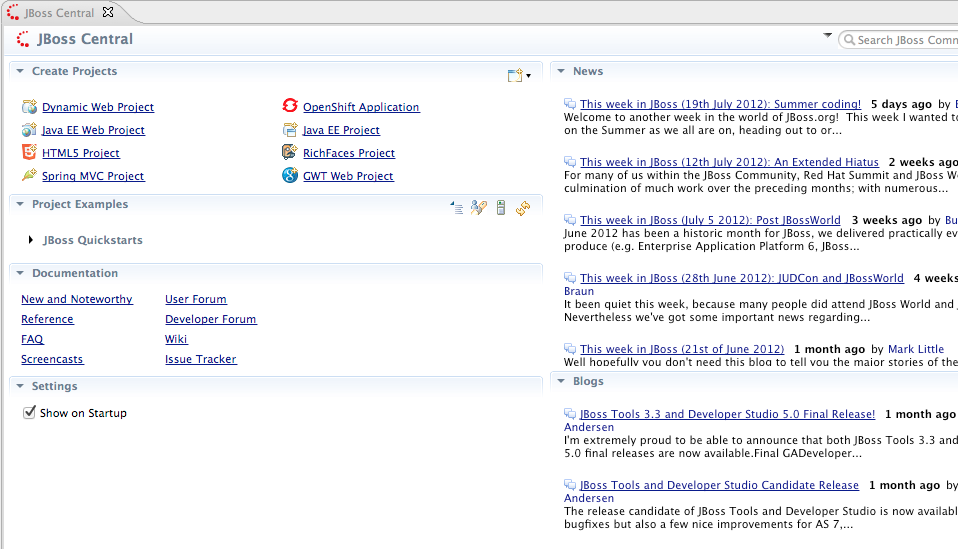
To create a new project, based on the kitchensink quickstart, click on Create Projects | Java EE Web Project:
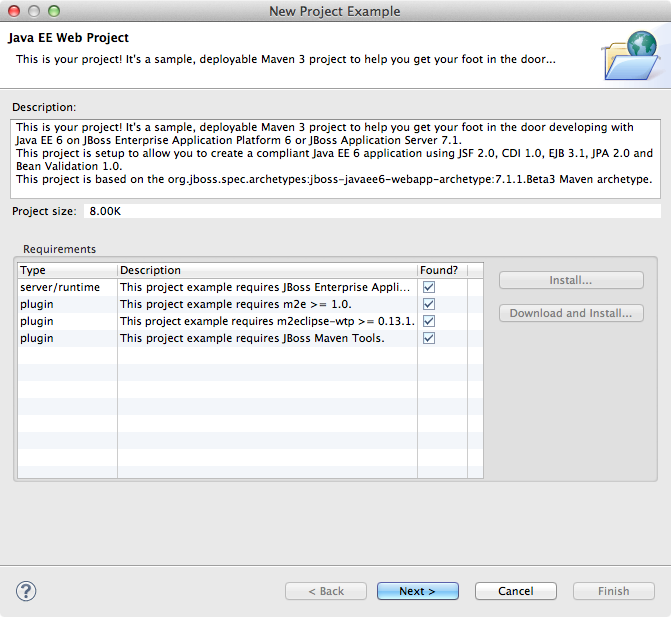
Red Hat JBoss Developer Studio will then check that you have the necessary pre-requisites to create the project. If you are using JBoss Developer Studio, then you should, otherwise, JBoss Tools will help you install the necessary pre-requisites. See JBoss Tools for more information.
Hit Next >. On the next screen you can enter a project name, package for sample code, and finally select a target runtime:
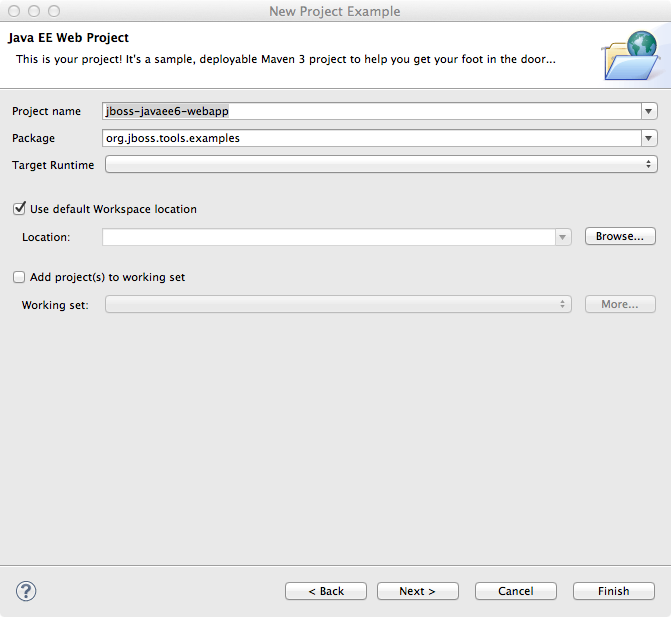
Finally, hit Finish. You’ll be presented with the New Project Example dialog, in which you can simply hit Finish:
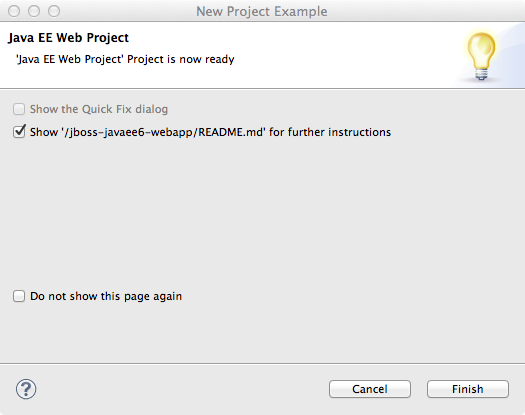
You should now have a brand new project:
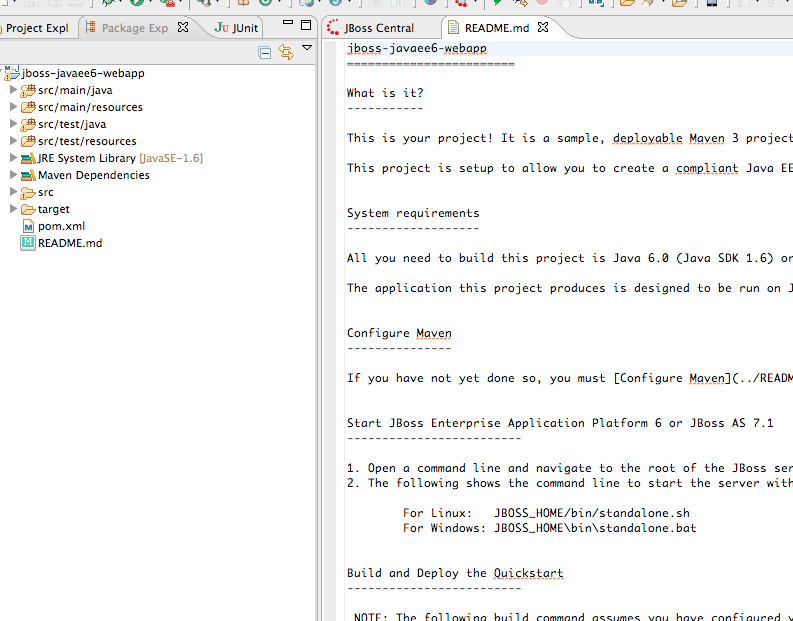
Enjoy!
To use the archetype to generate a new project, you should run:
mvn archetype:generate \
    -DarchetypeArtifactId=jboss-javaee7-webapp-archetype \
    -DarchetypeGroupId=org.jboss.spec.archetypes \
    -DarchetypeVersion=7.1.1.CR2 \
Maven will download the archetype and it’s dependencies, and ask you some questions:
$ > mvn archetype:generate \
        -DarchetypeArtifactId=jboss-javaee7-webapp-archetype \
        -DarchetypeGroupId=org.jboss.spec.archetypes \
        -DarchetypeVersion=7.1.1.CR2
[INFO] Scanning for projects...
[INFO]
[INFO] ------------------------------------------------------------------------
[INFO] Building Maven Stub Project (No POM) 1
[INFO] ------------------------------------------------------------------------
[INFO]

.........

Define value for property 'groupId': : com.acme.corp                 (1)
Define value for property 'artifactId': : acme-sales                 (2)
Define value for property 'version':  1.0-SNAPSHOT: :                (3)
Define value for property 'package':  com.acme.corp: :               (4)
[INFO] Using property: name = Java EE webapp project               (5)
Confirm properties configuration:
groupId: com.acme.corp
artifactId: acme-sales
version: 1.0-SNAPSHOT
package: com.acme.corp
name: Java EE webapp project
 Y: :
[WARNING] CP Don't override file /Users/pmuir/tmp/acme-sales/.settings/org.eclipse.jdt.apt.core.prefs
[INFO] ------------------------------------------------------------------------
[INFO] BUILD SUCCESS
[INFO] ------------------------------------------------------------------------
[INFO] Total time: 14.774s
[INFO] Finished at: Mon Jun 06 18:53:38 BST 2011
[INFO] Final Memory: 7M/125M
[INFO] ------------------------------------------------------------------------
$ >
| 1 | Enter the groupId you wish to use |
| 2 | Enter the artifactId you wish to use |
| 3 | Enter the version you wish to use, or just hit Enter if you wish to accept the default 1.0-SNAPSHOT |
| 4 | Enter the java package you wish to use, or just hit Enter if you wish to accept the default (which is copied from groupId ). |
| 5 | Finally, if you are happy with your choices, hit Enter and Maven will generate the project for you. |
And that’s it, you now have a brand new project with the same functionality as kitchensink, but customized with your details.
|
The archetype contains some sample code to get you started. If you
would prefer a blank canvas, with only a project skeleton, then use
|
|
Prefer Enterprise Applications (EARs)?
The archetype generates a WAR project. With Java EE, you can include
EJBs in your WAR, meaning you won’t need an EAR until you need to divide
your code into modules. If you would like to create an EAR based project
then use |
8. More Resources
The Getting Started Guide covers topics such as server layout (what you can configure where), data source definition, and using the web management interface. |
|
Torque Box allows you to use all the familiar services from JBoss AS 7, but with Ruby. |
|
Frequently Asked Questions for JBoss AS 7 |
8.1. Developing JSF Project Using JBoss AS7, Maven and IntelliJ
JBoss AS7 is a very 'modern' application server that has very fast startup speed. So it’s an excellent container to test your JSF project. In this article, I’d like to show you how to use AS7, maven and IntelliJ together to develop your JSF project.
In this article I’d like to introduce the following things:
-
Create a project using Maven
-
Add JSF into project
-
Writing Code
-
Add JBoss AS 7 deploy plugin into project
-
Deploy project to JBoss AS 7
-
Import project into IntelliJ
-
Add IntelliJ JSF support to project
-
Add JBoss AS7 to IntelliJ
-
Debugging project with IntelliJ and AS7
I won’t explain many basic concepts about AS7, maven and IntelliJ in this article because there are already many good introductions on these topics. So before doing the real work, there some preparations should be done firstly:
Download JBoss AS7
It could be downloaded from here: https://www.jboss.org/jbossas/downloads/
Using the latest release would be fine. When I’m writing this article the latest version is 7.1.1.Final.
Install Maven
Please make sure you have maven installed on your machine. Here is my environment:
weli@power:~$ mvn -version
Apache Maven 3.0.3 (r1075438; 2011-03-01 01:31:09+0800)
Maven home: /usr/share/maven
Java version: 1.6.0_33, vendor: Apple Inc.
Java home: /System/Library/Java/JavaVirtualMachines/1.6.0.jdk/Contents/Home
Default locale: en_US, platform encoding: MacRoman
OS name: "mac os x", version: "10.8", arch: "x86_64", family: "mac"
Get IntelliJ
In this article I’d like to use IntelliJ Ultimate Edition as the IDE for development, it’s a commercial software and can be downloaded from: https://www.jetbrains.com/idea/
The version I’m using is IntelliJ IDEA Ultimate 11.1
After all of these prepared, we can dive into the real work:
8.1.1. Create a project using Maven
Use the following maven command to create a web project:
mvn archetype:create -DarchetypeGroupId=org.apache.maven.archetypes \
-DarchetypeArtifactId=maven-archetype-webapp \
-DarchetypeVersion=1.0 \
-DgroupId=net.bluedash \
-DartifactId=jsfdemo \
-Dversion=1.0-SNAPSHOT
If everything goes fine maven will generate the project for us:
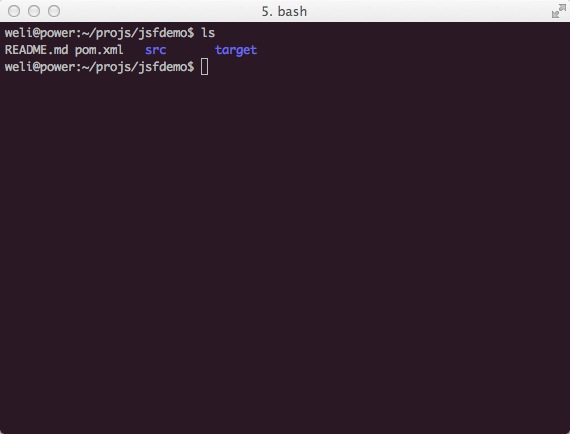
The contents of the project is shown as above.
8.1.2. Add JSF into project
The JSF library is now included in maven repo, so we can let maven to manage the download for us. First is to add repository into our pom.xml:
<repository>
  <id>jvnet-nexus-releases</id>
  <name>jvnet-nexus-releases</name>
  <url>https://maven.java.net/content/repositories/releases/</url>
</repository>
Then we add JSF dependency into pom.xml:
<dependency>
    <groupId>javax.faces</groupId>
    <artifactId>jsf-api</artifactId>
    <version>2.1</version>
    <scope>provided</scope>
</dependency>
Please note the 'scope' is 'provided', because we don’t want to bundle the jsf.jar into the war produced by our project later, as JBoss AS7 already have jsf bundled in.
Then we run 'mvn install' to update the project, and maven will download jsf-api for us automatically.
8.1.3. Writing Code
Writing JSF code in this article is trivial, so I’ve put written a project called 'jsfdemo' onto github:
Please clone this project into your local machine, and import it into IntelliJ following the steps described as above.
8.1.4. Add JBoss AS 7 deploy plugin into project
JBoss AS7 has provide a set of convenient maven plugins to perform daily tasks such as deploying project into AS7. In this step let’s see how to use it in our project.
We should put AS7’s repository into pom.xml:
<repository>
    <id>jboss-public-repository-group</id>
    <name>JBoss Public Repository Group</name>
    <url>https://repository.jboss.org/nexus/content/groups/public/</url>
    <layout>default</layout>
    <releases>
        <enabled>true</enabled>
        <updatePolicy>never</updatePolicy>
    </releases>
    <snapshots>
        <enabled>true</enabled>
        <updatePolicy>never</updatePolicy>
    </snapshots>
</repository>
And also the plugin repository:
<pluginRepository>
    <id>jboss-public-repository-group</id>
    <name>JBoss Public Repository Group</name>
    <url>https://repository.jboss.org/nexus/content/groups/public/</url>
    <releases>
        <enabled>true</enabled>
    </releases>
    <snapshots>
        <enabled>true</enabled>
    </snapshots>
</pluginRepository>
And put jboss deploy plugin into 'build' section:
<plugin>
    <groupId>org.jboss.as.plugins</groupId>
    <artifactId>jboss-as-maven-plugin</artifactId>
    <executions>
        <execution>
            <phase>package</phase>
            <goals>
                <goal>deploy</goal>
            </goals>
        </execution>
    </executions>
</plugin>
I’ve put the final version pom.xml here to check whether your modification is correct:
Now we have finished the setup work for maven.
8.1.5. Deploy project to JBoss AS 7
To deploy the project to JBoss AS7, we should start AS7 firstly. In JBoss AS7 directory, run following command:
bin/standalone.shAS7 should start in a short time. Then let’s go back to our project directory and run maven command:
mvn -q jboss-as:deployMaven will use some time to download necessary components for a while, so please wait patiently. After a while, we can see the result:
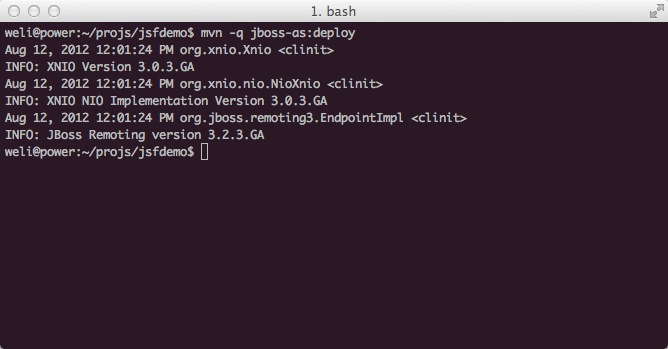
And if you check the console output of AS7, you can see the project is deployed:
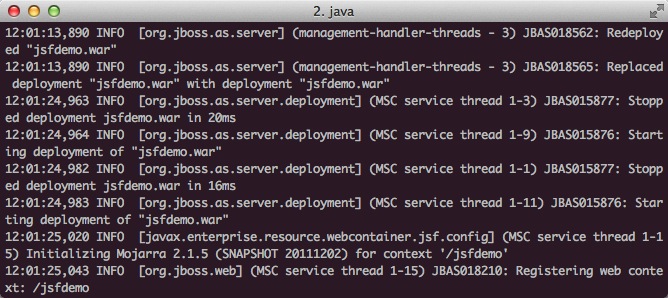
Now we have learnt how to create a JSF project and deploy it to AS7 without any help from graphical tools. Next let’s see how to use IntelliJ IDEA to go on developing/debugging our project.
8.1.6. Import project into IntelliJ
Now it’s time to import the project into IntelliJ. Now let’s open IntelliJ, and choose 'New Project…':
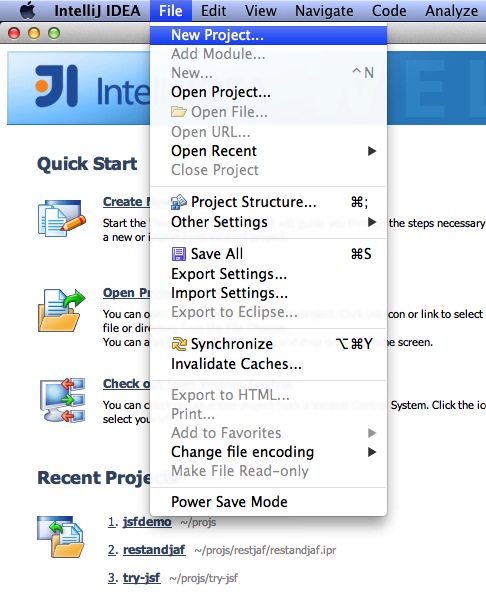
The we choose 'Import project from external model':
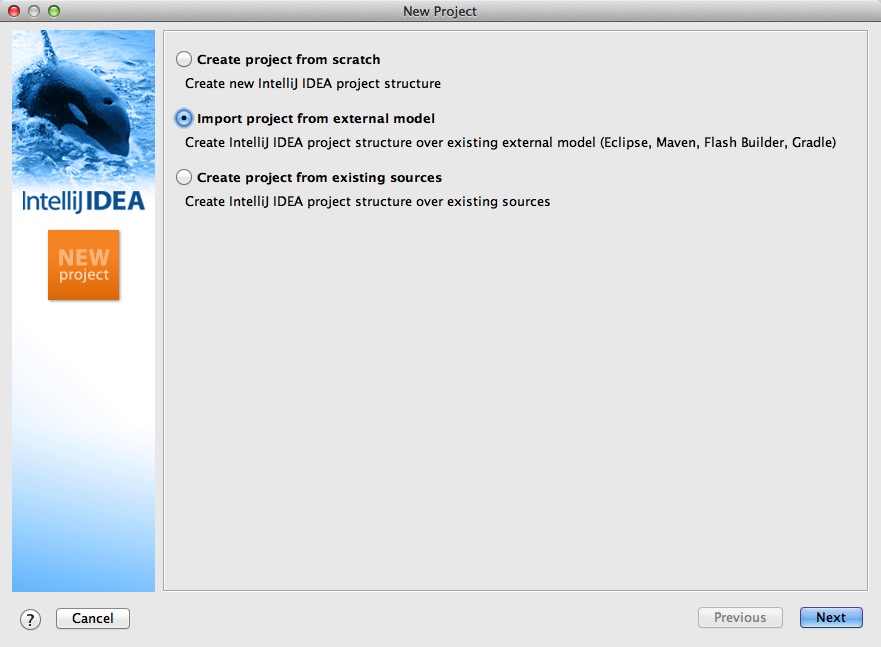
Next step is choosing 'Maven':
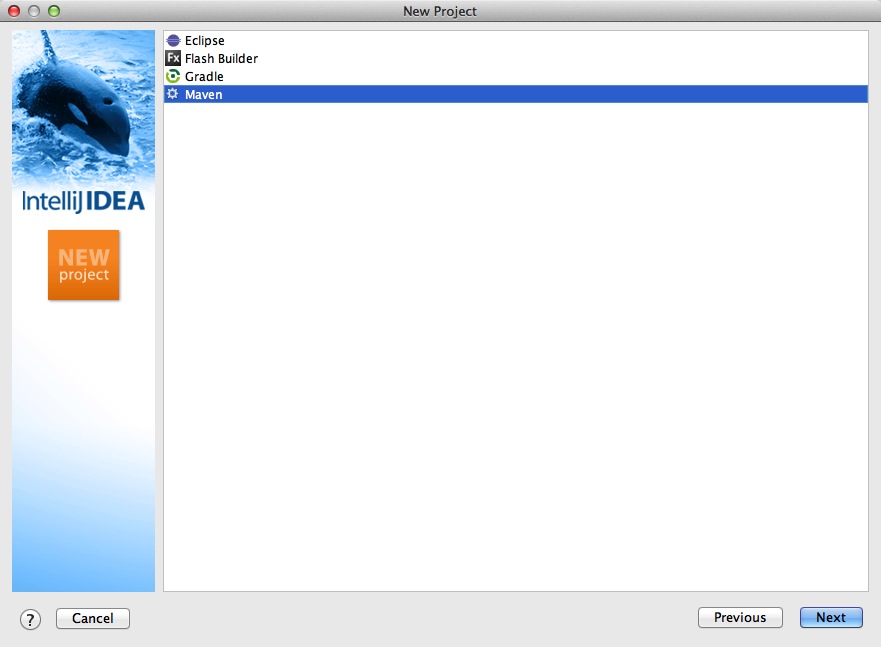
Then IntelliJ will ask you the position of the project you want to import. In 'Root directory' input your project’s directory and leave other options as default:
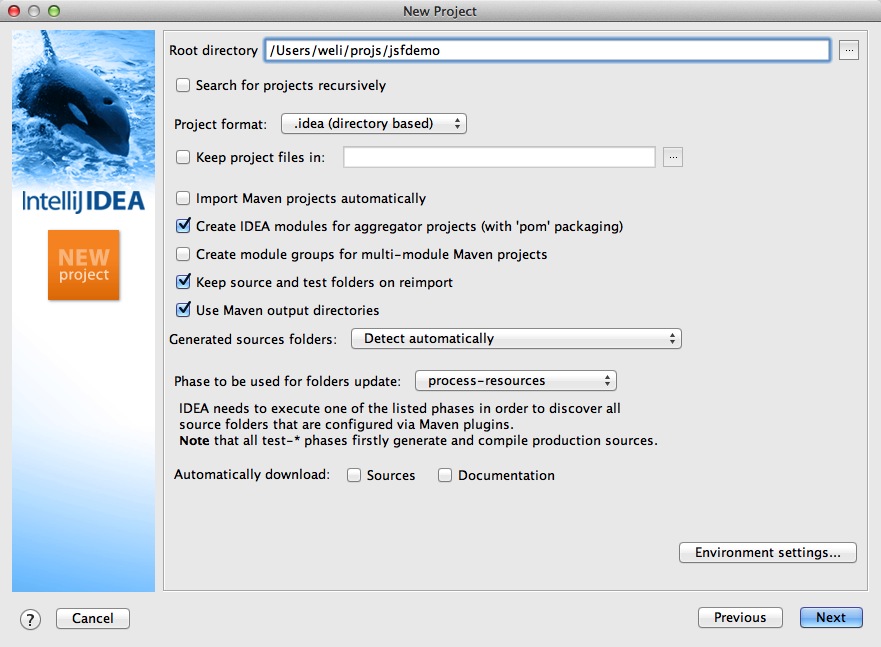
For next step, just click 'Next':
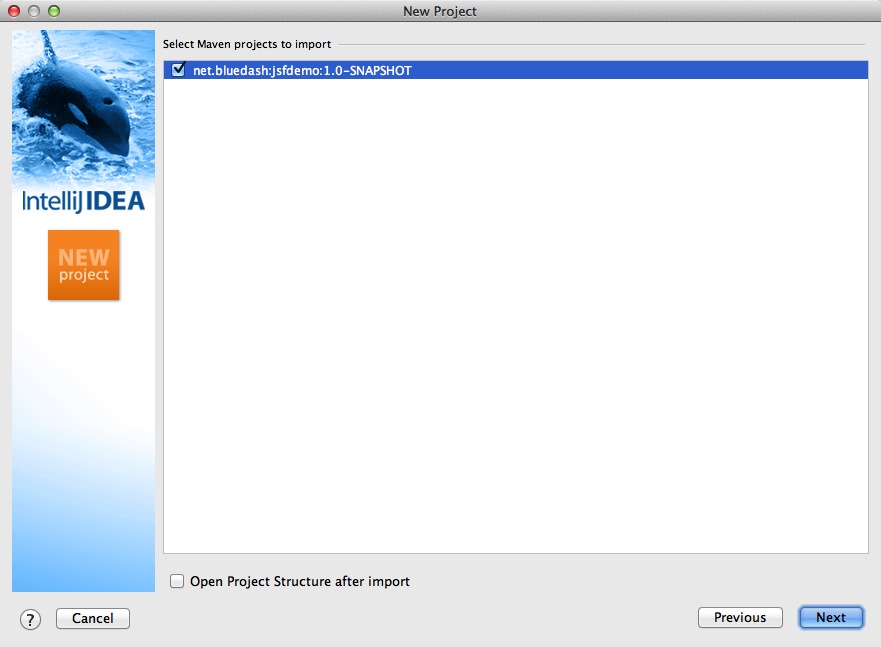
Finally click 'Finish':
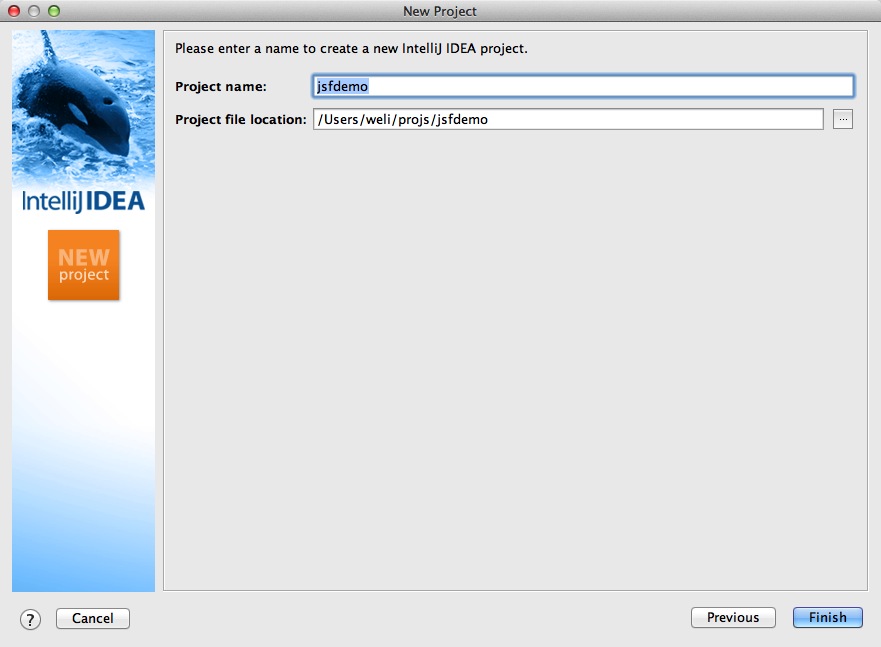
Hooray! We’ve imported the project into IntelliJ now
8.1.7. Adding IntelliJ JSF support to project
Let’s see how to use IntelliJ and AS7 to debug the project. First we need to add 'JSF' facet into project. Open project setting:
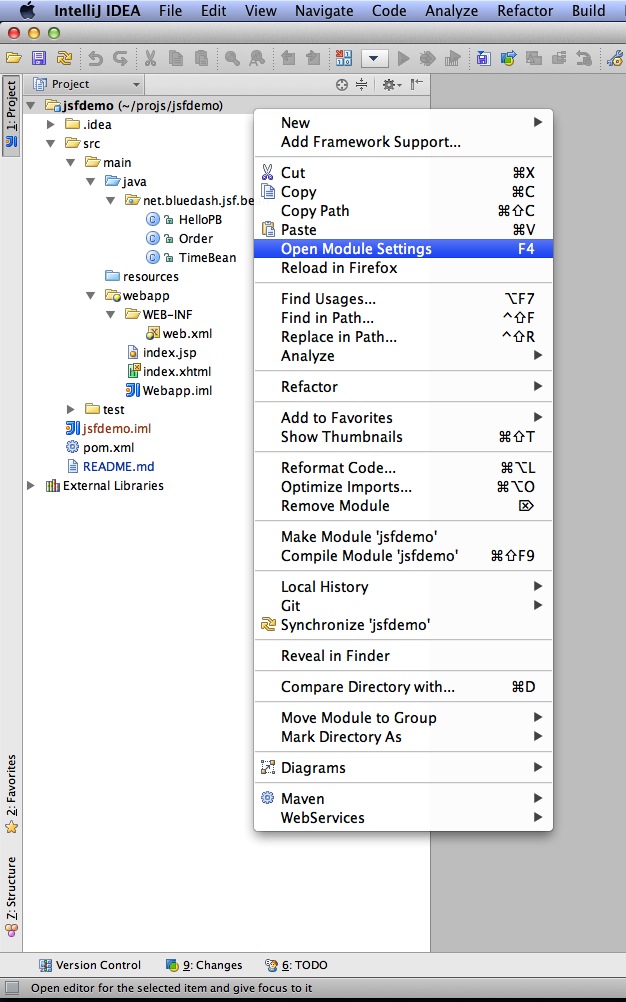
Click on 'Facets' section on left; Select 'Web' facet that we already have, and click the '+' on top, choose 'JSF':
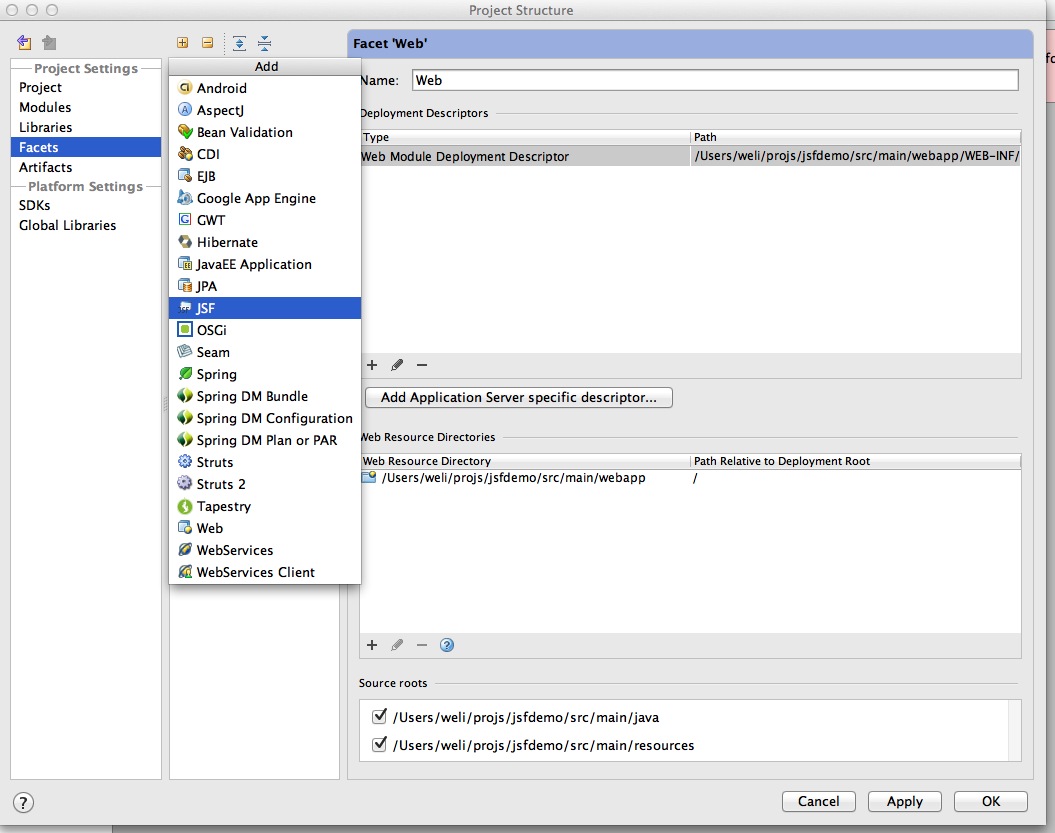
Select 'Web' as parent facet:
Click 'Ok':
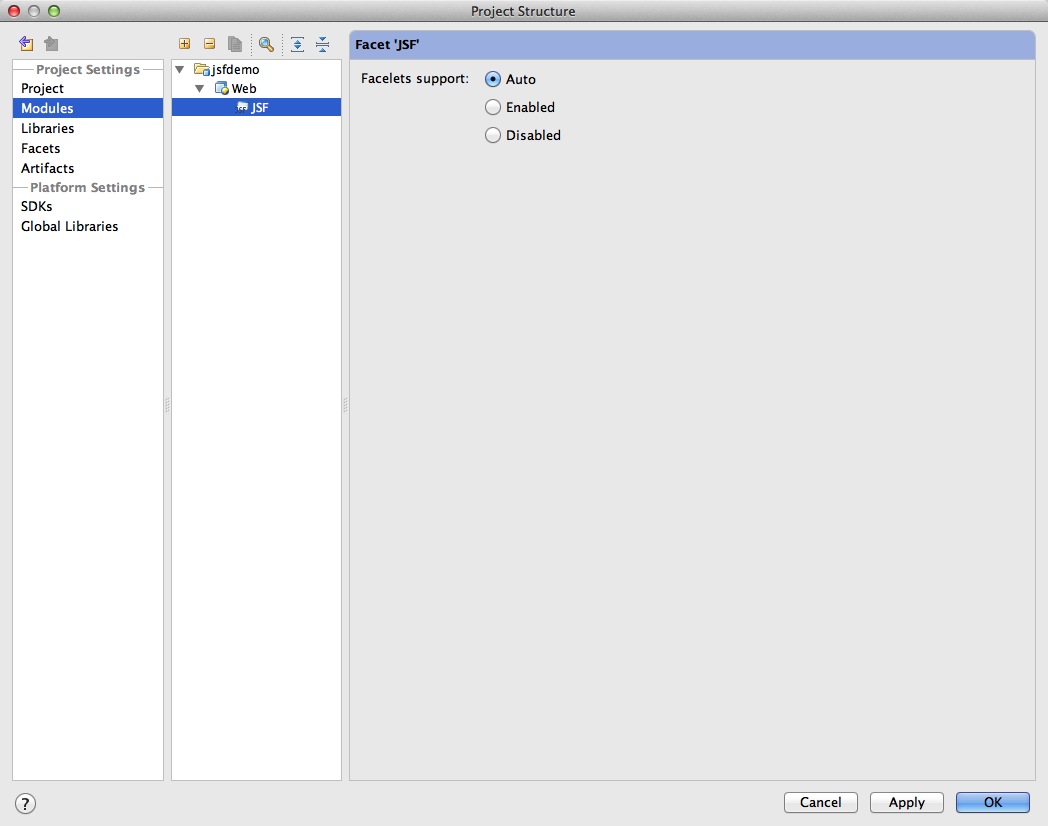
Now we have enabled IntelliJ’s JSF support for project.
8.1.8. Add JBoss AS7 to IntelliJ
Let’s add JBoss AS7 into IntelliJ and use it to debug our project. First please choose 'Edit Configuration' in menu tab:
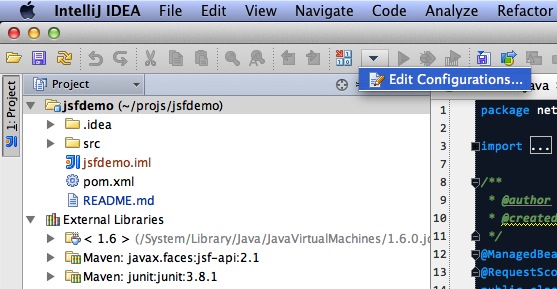
Click '+' and choose 'JBoss Server' → 'Local':
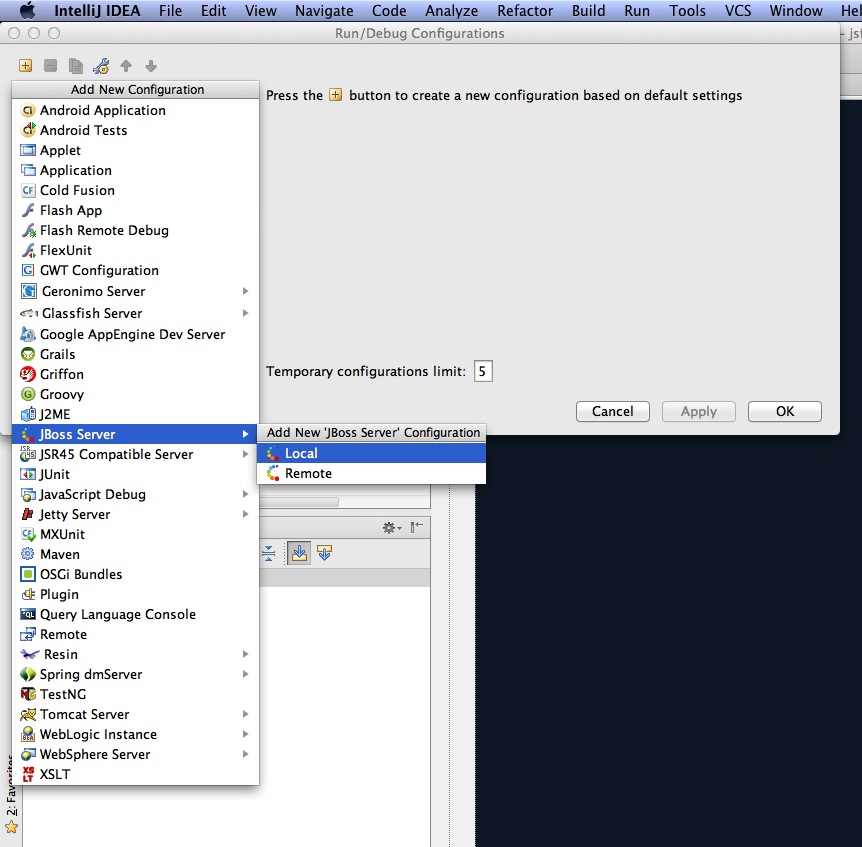
Click 'configure':
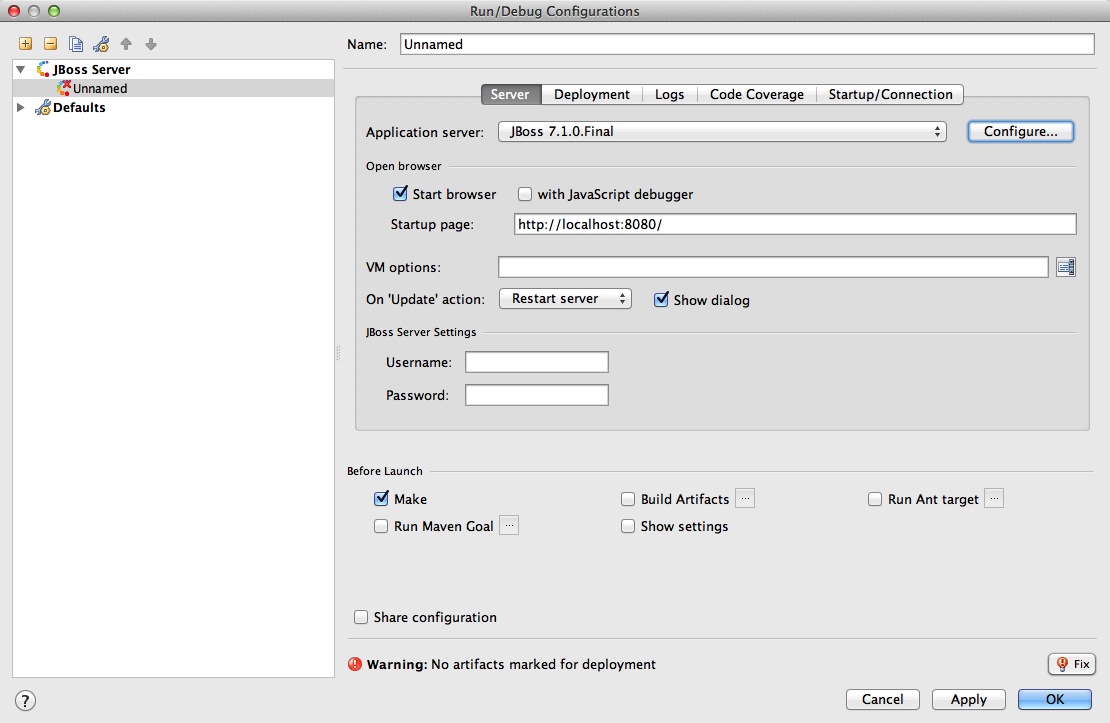
and choose your JBoss AS7:
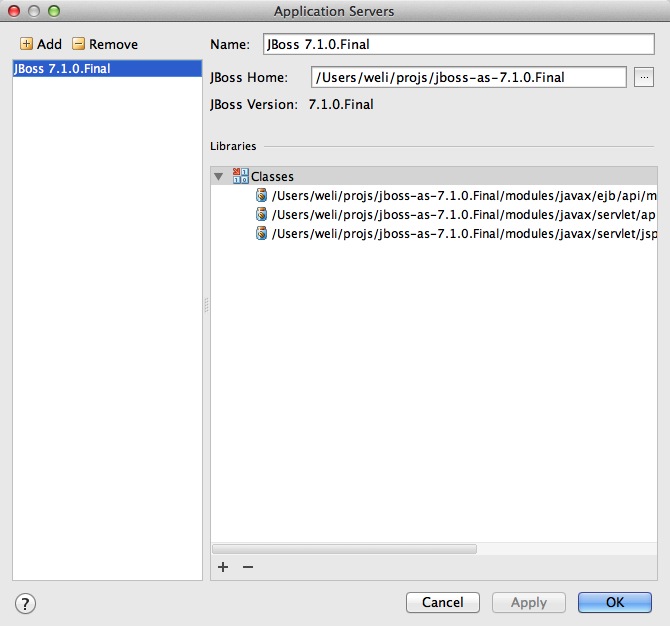
Now we need to add our project into deployment. Click the 'Deployment' tab:

Choose 'Artifact', and add our project:
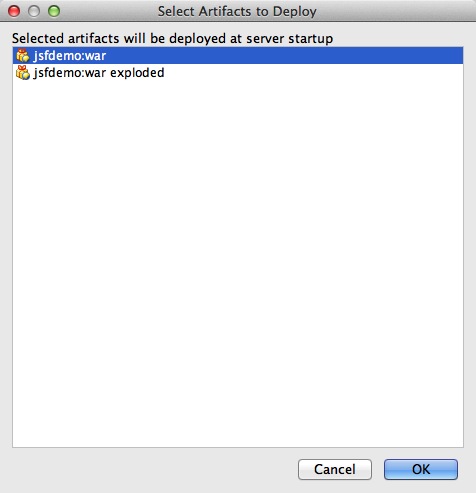
Leave everything as default and click 'Ok', now we’ve added JBoss AS7 into IntelliJ
8.1.9. Debugging project with IntelliJ and AS7
Now comes the fun part. To debug our project, we cannot directly use the 'debug' feature provided by IntelliJ right now(maybe in the future version this problem could be fixed). So now we should use the debugging config provided by AS7 itself to enable JPDA feature, and then use the remote debug function provided by IntelliJ to get things done. Let’s dive into the details now:
First we need to enable JPDA config inside AS7, open 'bin/standalone.conf' and find following lines:
# Sample JPDA settings for remote socket debugging
#JAVA_OPTS="$JAVA_OPTS -Xrunjdwp:transport=dt_socket,address=8787,server=y,suspend=n"
Enable the above config by removing the leading hash sign:
# Sample JPDA settings for remote socket debugging
JAVA_OPTS="$JAVA_OPTS -Xrunjdwp:transport=dt_socket,address=8787,server=y,suspend=n"| With WildFly you can directly start the server in debug mode: |
bin/standalone.sh --debug --server-config=standalone.xmlNow we start AS7 in IntelliJ:
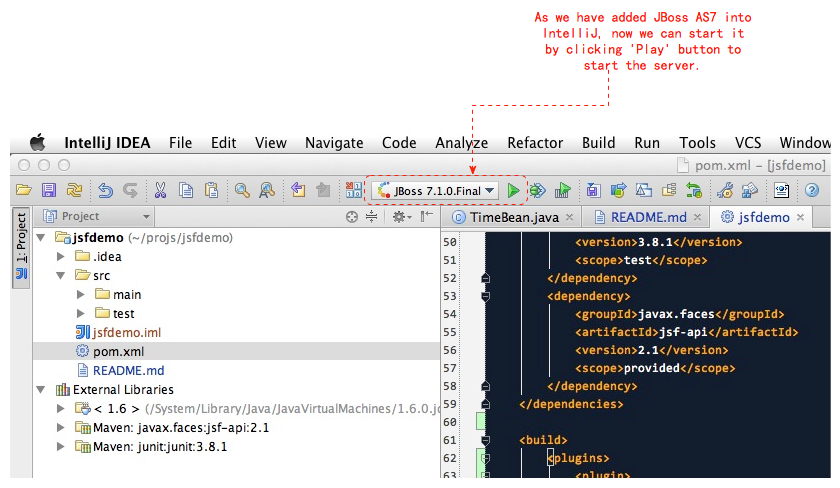
Please note we should undeploy the existing 'jsfdemo' project in AS7 as we’ve added by maven jboss deploy plugin before. Or AS7 will tell us there is already existing project with same name so IntelliJ could not deploy the project anymore.
If the project start correctly we can see from the IntelliJ console window, and please check the debug option is enabled:
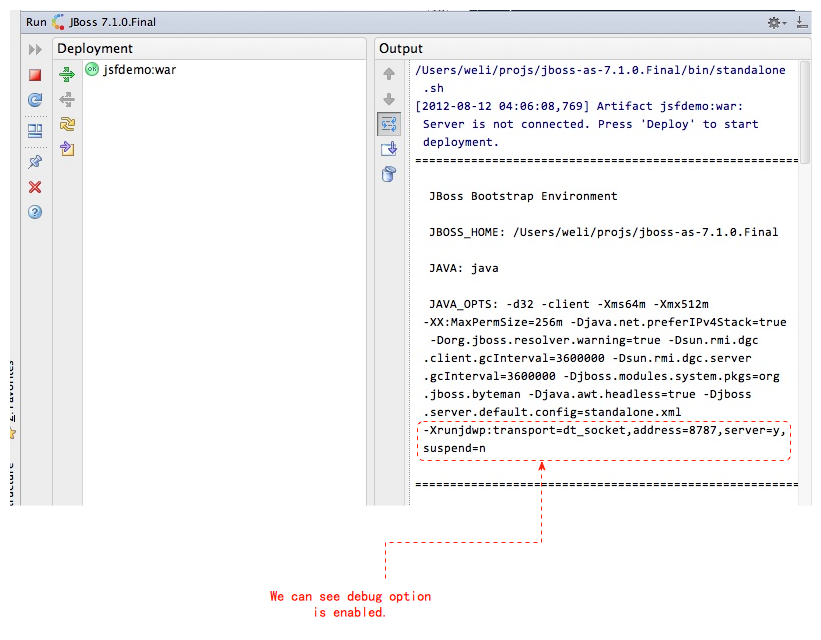
Now we will setup the debug configuration, click 'debug' option on menu:

Choose 'Edit Configurations':

Then we click 'Add' and choose Remote:
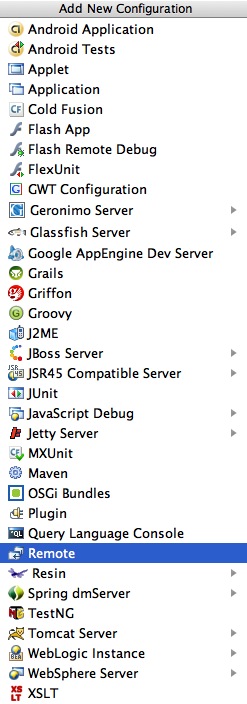
Set the 'port' to the one you used in AS7 config file 'standalone.conf':
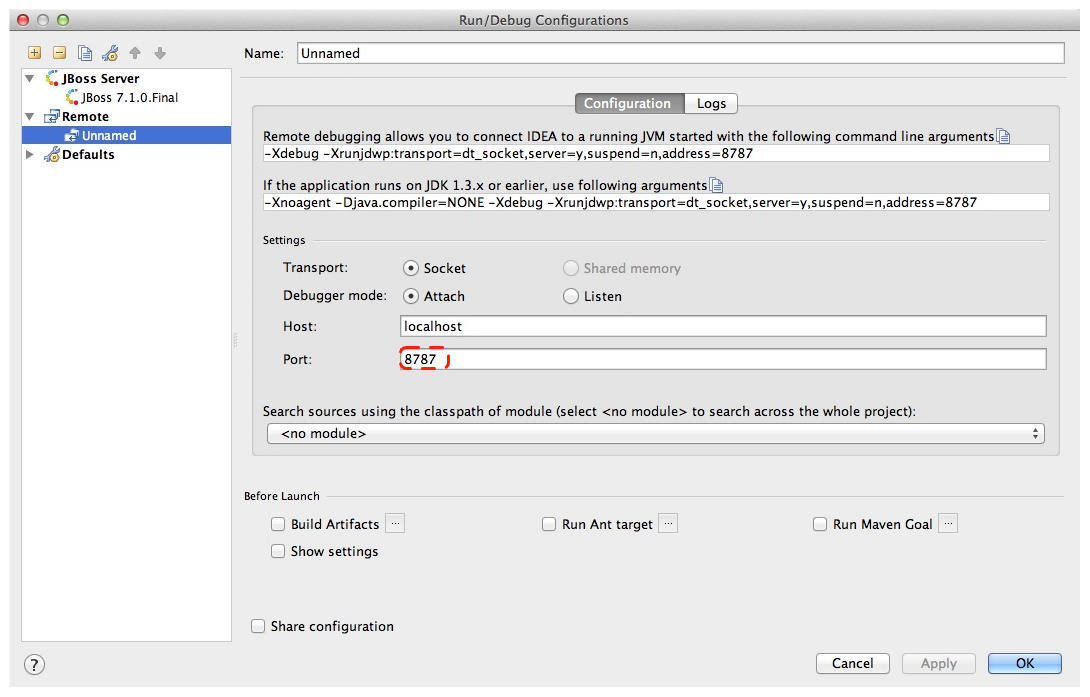
Leave other configurations as default and click 'Ok'. Now we need to set breakpoints in project, let’s choose TimeBean.java and set a breakpoint on 'getNow()' method by clicking the left side of that line of code:
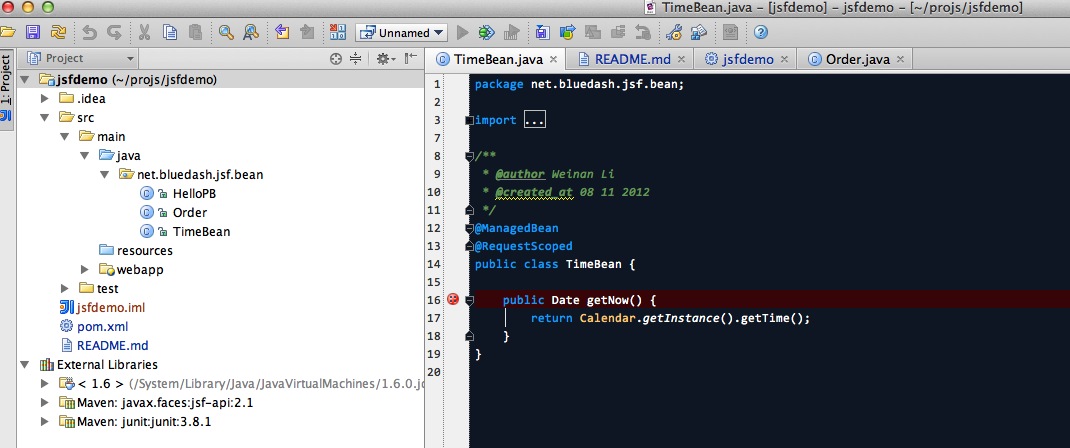
Now we can use the profile to do debug:
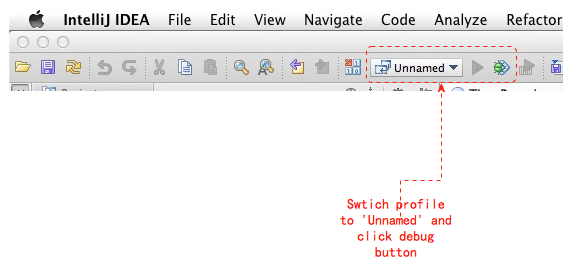
If everything goes fine we can see the console output:
Now we go to web browser and see our project’s main page, try to click on 'Get current time':
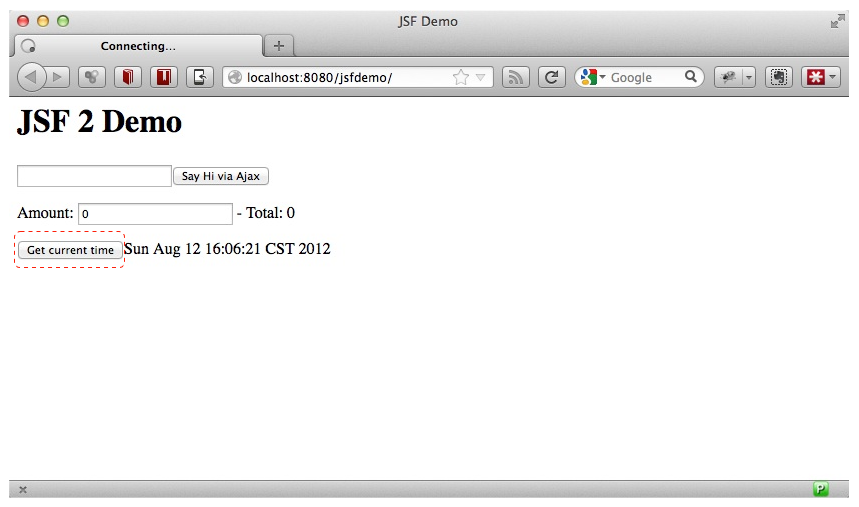
Then IntelliJ will popup and the code is pausing on break point:
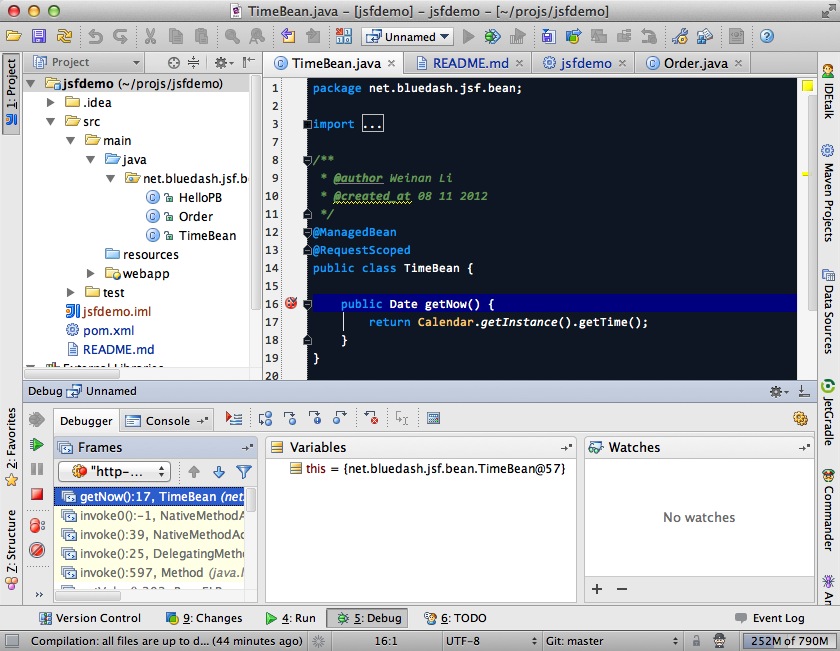
And we could inspect our project now.
8.1.10. Conclusion
In this article I’ve shown to you how to use maven to create a project using JSF and deploy it in JBoss AS7, and I’ve also talked about the usage of IntelliJ during project development phase. Hope the contents are practical and helpful to you
8.2. Getting Started Developing Applications Presentation & Demo
This document is a "script" for use with the quickstarts associated with the Getting Started Developing Applications Guide. It can be used as the basis for demoing/explaining the Jakarta EE programming model with JBoss AS 7.
There is an associated presentation – JBoss AS - Getting Started Developing Applications – which can be used to introduce the Jakarta EE ecosystem.
The emphasis here is on the programming model, not on OAM/dev-ops, performance etc.
8.2.1. Prerequisites for using the script
-
JBoss AS 7 downloaded and installed
-
Eclipse Indigo with m2eclipse and JBoss Tools installed
-
The quickstarts downloaded and imported into Eclipse
-
Make sure
$JBOSS_HOMEis set. -
Make sure
src/test/resources/arquillian.xmlhas the correct path to your JBoss AS install for kitchensink -
Make sure your font size is set in Eclipse so everyone can read the text!
8.2.2. Import examples into Eclipse and set up JBoss AS
TODO
8.2.3. The Helloworld Quickstart
Introduction
This quickstart is extremely basic, and is really useful for nothing more than showing than the app server is working properly, and our deployment mechanism is working. We recommend you use this quickstart to demonstrate the various ways you can deploy apps to JBoss AS 7.
Using Maven
-
Start JBoss AS 7 from the console
$ JBOSS_HOME/bin/standalone.sh -
Deploy the app using Maven
$ mvn clean package jboss-as:deployThe quickstarts use the jboss-as maven plugin to deploy and undeploy applications. This plugin uses the JBoss AS Native Java Detyped Management API to communicate with the server. The Detyped API is used by management tools to control an entire domain of servers, and exposes only a small number of types, allowing for backwards and forwards compatibility.
-
Show the app has deployed in the terminal.
-
Undeploy the app using Maven
$ mvn jboss-as:undeploy
Using the Command Line Interface (CLI)
-
Start JBoss AS 7 from the console (if not already running)
$ JBOSS_HOME/bin/standalone.sh -
Build the war
$ mvn clean package -
Start the CLI
$ JBOSS_HOME/bin/jboss-admin.sh --connectThe command line also uses the Deptyped Management API to communicate with the server. It’s designed to be as "unixy" as possible, allowing you to "cd" into nodes, with full tab completion etc. The CLI allows you to deploy and undeploy applications, create JMS queues, topics etc., create datasources (normal and XA). It also fully supports the domain node. -
Deploy the app
$ deploy target/jboss-as-helloworld.war -
Show the app has deployed
$ undeploy jboss-as-helloworld.war
Using the web management interface
-
Start JBoss AS 7 from the console (if not already running)
$ JBOSS_HOME/bin/standalone.sh -
Build the war
$ mvn clean package -
Open up the web management interface http://localhost:9990/console
The web management interface offers the same functionality as the CLI (and again uses the Detyped Management API), but does so using a pretty GWT interface! You can set up virtual servers, interrogate sub systems and more.
-
Navigate
Manage Deployments → Add content. Click on choose file and locatehelloworld/target/jboss-as-helloworld.war. -
Click
NextandFinishto upload the war to the server. -
Now click
EnableandOkto start the application -
Switch to the console to show it deployed
-
Now click
Remove
Using the filesystem
-
Start JBoss AS 7 from the console (if not already running)
$ JBOSS_HOME/bin/standalone.sh -
Build the war
$ mvn clean packageOf course, you can still use the good ol' file system to deploy. Just copy the file to
$JBOSS_HOME/standalone/deployments. -
Copy the war
$ cp target/jboss-as-helloworld.war $JBOSS_HOME/standalone/deployments -
Show the war deployed
The filesystem deployment uses marker files to indicate the status of a deployment. As this deployment succeeded we get a
$JBOSS_HOME/standalone/deployments/jboss-as-helloworld.war.deployedfile. If the deployment failed, you would get a.failedfile etc. -
Undeploy the war
rm $JBOSS_HOME/standalone/deployments/jboss-as-helloworld.war.deployed -
Show the deployment stopping!
-
Start and stop the app server, show that the deployment really is gone!
This gives you much more precise control over deployments than before
Using Eclipse
-
Add a JBoss AS server
-
Bring up the Server view
-
Right click in it, and choose
New → Server
-
-
Choose JBoss AS 7.0 and hit Next
-
Locate the server on your disc
-
Hit Finish
-
-
Start JBoss AS in Eclipse
-
Select the server
-
Click the Run button
-
Deploy the app
-
-
right click on the app, choose
Run As → Run On Server-
Select the AS 7 instance you want to use
-
Hit finish
-
-
Load the app at http://localhost:8080/jboss-as-helloworld
Digging into the app
-
Open up the helloworld quickstart in Eclipse, and open up
src/main/webapp. -
Point out that we don’t require a
web.xmlanymore! -
Show
beans.xmland explain it’s a marker file used to JBoss AS to enable CDI (open it, show that it is empty) -
Show
index.html, and explain it is just used to kick the user into the app (open it, show the meta-refresh) -
Open up the
pom.xm- and emphasise that it’s pretty simple.-
There is no parent pom, everything for the build is here
-
Show that we are enabling the JBoss Maven repo - explain you can do this in your POM or in system wide (
settings.xml) -
Show the
dependencyManagementsection. Here we import the JBoss AS 7 Web Profile API. Explain that this gives you all the versions for all of the JBoss AS 7 APIs that are in the web profile. Explain we could also depend on this directly, which would give us the whole set of APIs, but that here we’ve decided to go for slightly tighter control and specify each dependency ourselves -
Show the import for CDI, JSR-250 and Servlet API. Show that these are all provided - we are depending on build in server implementations, not packaging this stuff!
-
Show the plugin sections - nothing that exciting here, the war plugin is out of date and requires you to provide
web.xml, configure the JBoss AS Maven Plugin, set the Java version to 6.
-
-
Open up
src/main/javaand open up theHelloWorldServlet.-
Point out the
@WebServlet- explain this one annotation removes about 8 lines of XML - no need to separately map a path either. This is much more refactor safe -
Show that we can inject services into a Servlet
-
Show that we use the service (line 41)
#Cmd-click onHelloService -
This is a CDI bean - very simple, no annotations required!
-
Explain injection
-
Probably used to string based bean resolution
-
This is typesafe (refactor safe, take advantage of the compiler and the IDE - we just saw that!)
-
When CDI needs to inject something, the first thing it looks at is the type - and if the type of the injection point is assignable from a bean, CDI will inject that bean
-
-
8.2.4. The numberguess quickstart
Introduction
This quickstart adds in a "complete" view layer into the mix. Java EE ships with a JSF. JSF is a server side rendering, component orientated framework, where you write markup using an HTML like language, adding in dynamic behavior by binding components to beans in the back end. The quickstart also makes more use of CDI to wire the application together.
Run the app
-
Start JBoss AS in Eclipse
-
Deploy it using Eclipse - just right click on the app, choose
Run As → Run On Server -
Select the AS 7 instance you want to use
-
Hit finish
-
Load the app at http://localhost:8080/jboss-as-numberguess
-
Make a few guesses
Deployment descriptors src/main/webapp/WEB-INF
Emphasize the lack of them!
No need to open any of them, just point them out
-
web.xml- don’t need it! -
beans.xml- as before, marker file -
faces-config.xml- nice feature from AS7 - we can just putfaces-config.xmlinto the WEB-INF and it enables JSF (inspiration from CDI) -
pom.xmlwe saw this before, this time it’s the same but adds in JSF API
Views
-
index.html- same as before, just kicks us into the app -
home.xhtml-
Lines 19 - 25 – these are messages output depending on state of beans (minimise coupling between controller and view layer by interrogating state, not pushing)
-
-
Line 20 – output any messages pushed out by the controller
-
Line 39 - 42 – the input field is bound to the guess field on the game bean. We validate the input by calling a method on the game bean.
-
Line 43 - 45 – the command button is used to submit the form, and calls a method on the game bean
-
Line 48, 49, The reset button again calls a method on the game bean
Beans
-
Game.java– this is the main controller for the game. App has no persistence etc.-
@Named– As we discussed CDI is typesafe, (beans are injected by type) but sometimes need to access in a non-typesafe fashion. @Named exposes the Bean in EL - and allows us to access it from JSF -
@SessionScoped– really simple app, we keep the game data in the session - to play two concurrent games, need two sessions. This is not a limitation of CDI, but simply keeps this demo very simple. CDI will create a bean instance the first time the game bean is accessed, and then always load that for you -
@Inject maxNumber– here we inject the maximum number we can guess. This allows us to externalize the config of the game -
@Inject rnadomNumber– here we inject the random number we need to guess. Two things to discuss here -
Instance - normally we can inject the object itself, but sometimes it’s useful to inject a "provider" of the object (in this case so that we can get a new random number when the game is reset!). Instance allows us to
get()a new instance when needed -
Qualifiers - now we have two types of Integer (CDI auto-boxes types when doing injection) so we need to disambiguate. Explain qualifiers and development time approach to disambiguation. You will want to open up
@MaxNumberand@Randomhere. -
@PostConstruct– here is our reset method - we also call it on startup to set up initial values. Show use ofInstance.get().
-
-
Generator.javaThis bean acts as our random number generator. -
@ApplicationScopedexplain about other scopes available in CDI
extensibility.-
next()Explain about producers being useful for determining bean instance at runtime -
getMaxNumber()Explain about producers allowing for loose coupling
-
8.2.5. The login quickstart
Introduction
The login quickstart builds on the knowledge of CDI and JSF we have got from numberguess. New stuff we will learn about is how to use JPA to store data in a database, how to use JTA to control transactions, and how to use EJB for declarative TX control.
Run the app
-
Start JBoss AS in Eclipse
-
Deploy it using Eclipse - just right click on the app, choose
Run As → Run On Server -
Select the AS 7 instance you want to use
-
Hit finish
-
Load the app at http://localhost:8080/jboss-as-login
-
Login as admin/admin
-
Create a new user
Deployment Descriptors
-
Show that we have the same ones we are used in
src/main/webapp–beans.xml,faces-config.xml -
We have a couple of new ones in
src/main/resources-
persistence.xml. Not too exciting. We are using a datasource that AS7 ships with. It’s backed by the H2 database and is purely a sample datasource to use in sample applications. We also tell Hibernate to auto-create tables - as you always have. -
import.sqlAgain, the same old thing you are used to in Hibernate-
auto-import data when the app starts.
-
-
-
pom.xmlis the same again, but just adds in dependencies for JPA, JTA and EJB
Views
-
template.xhtmlOne of the updates added to JSF 2.0 was templating ability. We take advantage of that in this app, as we have multiple views-
Actually nothing too major here, we define the app "title" and we could easily define a common footer etc. (we can see this done in the kitchensink app)
-
The
ui:insertcommand inserts the actual content from the templated page.
#home.xhtml -
Uses the template
-
Has some input fields for the login form, button to login and logout, link to add users.
-
Binds fields to credentials bean}}
-
Buttons link to login bean which is the controller
-
-
users.xhtml-
Uses the template
-
Displays all users using a table
-
Has a form with input fields to add users.
-
Binds fields to the newUser bean
-
Methods call on userManager bean
-
Beans
-
Credentials.javaBacking bean for the login form field, pretty trivial. It’s request scoped (natural for a login field) and named so we can get it from JSF. -
Login.java-
Is session scoped (a user is logged in for the length of their session or until they log out}}
-
Is accessible from EL
-
Injects the current credentials
-
Uses the userManager service to load the user, and sends any messages to JSF as needed
-
Uses a producer method to expose the @LoggedIn user (producer methods used as we don’t know which user at development time)
-
-
User.javaIs a pretty straightforward JPA entity. Mapped with@Entity, has an natural id. -
UserManager.javaThis is an interface, and by default we use the ManagedBean version, which requires manual TX control -
ManagedBeanUserManager.java- accessible from EL, request scoped.-
Injects a logger (we’ll see how that is produced in a minute)
-
Injects the entity manager (again, just a min)
-
Inject the UserTransaction (this is provided by CDI)
-
getUsers()standard JPA-QL that we know and love - but lots of ugly TX handling code. -
Same for
addUser()andfindUser()methods - very simple JPA but… -
Got a couple of producer methods.
-
getUsers()is obvious - loads all the users in the database. No ambiguity - CDI takes into account generic types when injecting. Also note that CDI names respect JavaBean naming conventions -
getNewUser()is used to bind the new user form to from the view layer - very nice as it decreases coupling - we could completely change the wiring on the server side (different approach to creating the newUser bean) and no need to change the view layer.
-
-
-
EJBUserManager.java-
It’s an alternative – explain alternatives, and that they allow selection of beans at deployment time
-
Much simple now we have declarative TX control.
-
Start to see how we can introduce EJB to get useful enterprise services such as declarative TX control
-
-
Resources.java-
{EntityManager}- explain resource producer pattern
-
8.2.6. The kitchensink quickstart
Introduction
The kitchensink quickstart is generated from an archetype available for JBoss AS (tell people to check the Getting Started Developing Applications Guide for details). It demonstrates CDI, JSF, EJB, JPA (which we’ve seen before) and JAX-RS and Bean Validation as well. We add in Arquillian for testing.
Run the app
-
Start JBoss AS in Eclipse
-
Deploy it using Eclipse - just right click on the app, choose
Run As → Run On Server -
Select the AS 7 instance you want to use
-
Hit finish
-
Load the app at http://localhost:8080/jboss-as-kitchensink
-
Register a member - make sure to enter an invalid email and phone - show bean validation at work
-
Click on the member URL and show the output from JAX-RS
Bean Validation
-
Explain the benefits of bean validation - need your data always valid (protect your data) AND good errors for your user. BV allows you to express once, apply often.
-
index.xhtml-
Show the input fields – no validators attached
-
Show the message output
-
-
Member.java-
Hightlight the various validation annotations
-
-
Jakarta EE automatically applies the validators in both the persistence layer and in your views
JAX-RS
-
index.xhtml- Show that URL generation is just manual -
JaxRsActivator.java- simply activates JAX-RS -
Member.java- add JAXB annotation to make JAXB process the class properly -
MemberResourceRESTService.java-
@Pathsets the JAX-RS resource -
JAX-RS services can use injection
-
@GETmethods are auto transformed to XML using JAXB
-
-
And that is it!
Arquillian
-
Make sure JBoss AS is running
mvn clean test -Parq-jbossas-remote -
Explain the difference between managed and remote
-
Make sure JBoss AS is stopped
mvn clean test -Parq-jbossas-managed -
Start JBoss AS in Eclipse
-
Update the project to use the
arq-jbossas-remoteprofile -
Run the test from Eclipse
Right click on test,
Run As → JUnit TestMemberRegistrationTest.java -
Discuss micro deployments
-
Explain Arquilian allows you to use injection
-
Explain that Arquillian allows you to concentrate just on your test logic